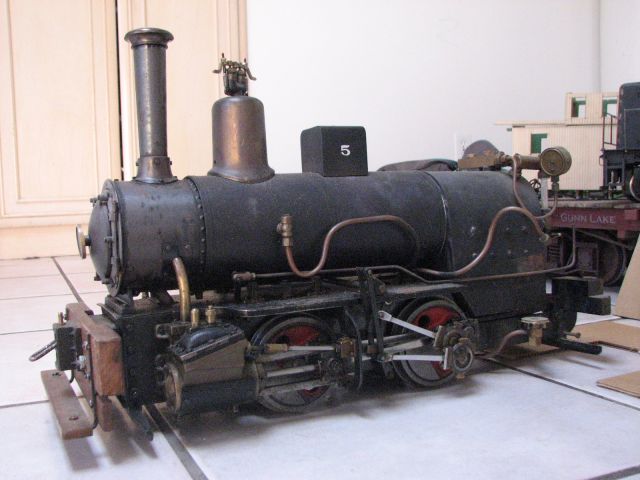


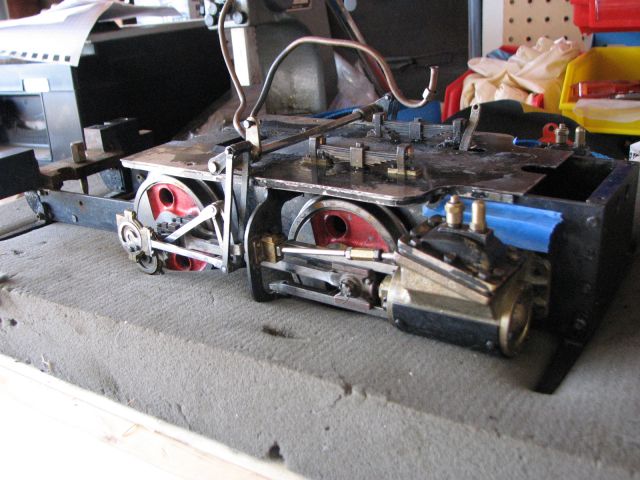


| Eric originally purchased this 3.5" gauge O.S. Krauss back in 2001. It has been undergoing the most gradual Americanization in history. |
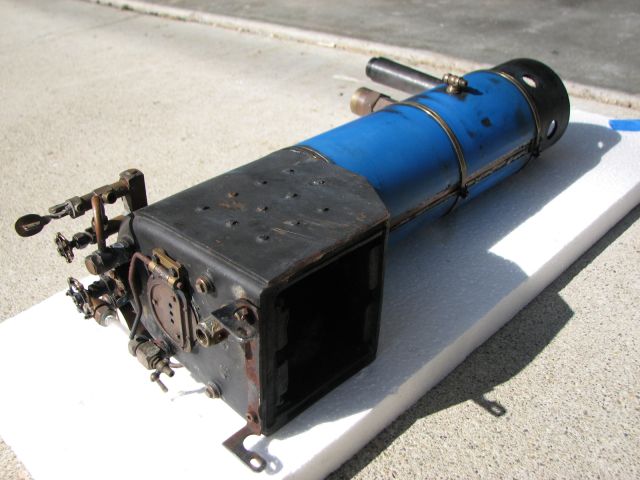
| The Krauss was a small tank engine in 1:10 scale. Eric is converting it into a 1:8 scale tender locomotive. here the cab and side tanks have been removed. |
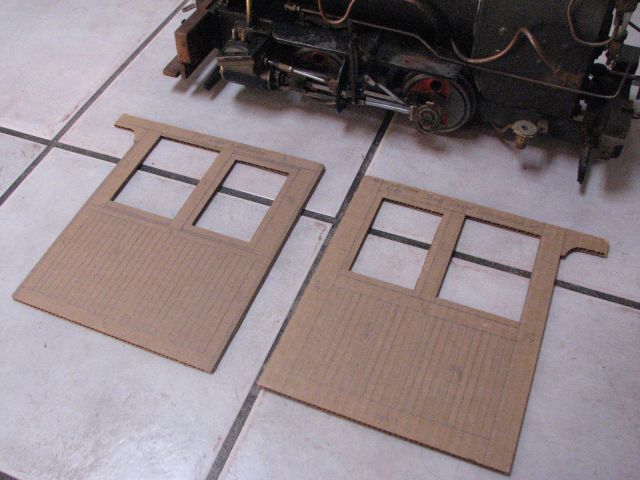
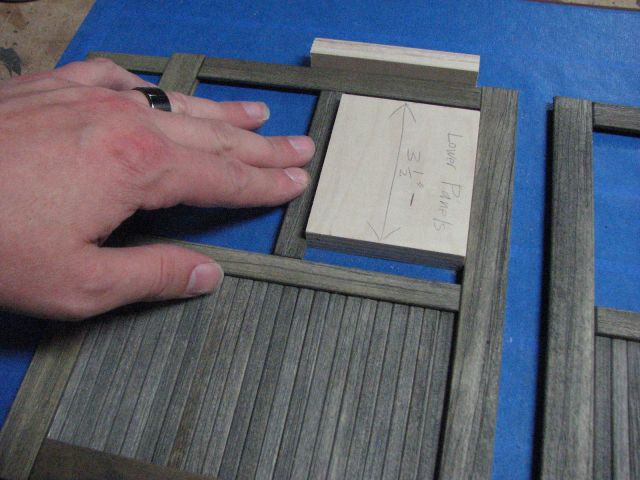
| These are the cardboard templates for the cab sides. They are about 9 1/2" tall. Eric penciled in all the wood details and dimensions on the cardboard for reference. |
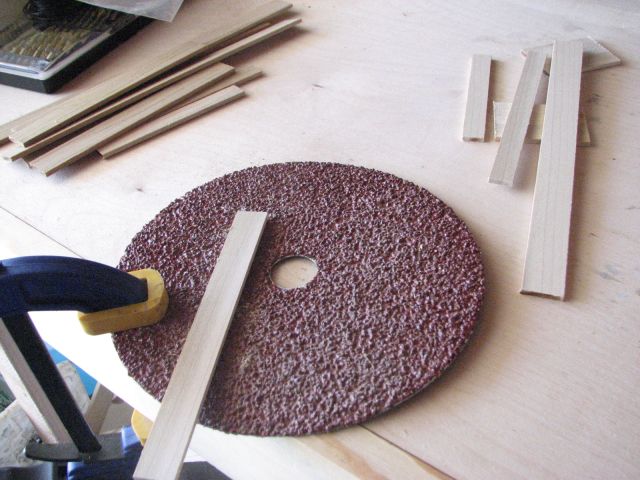
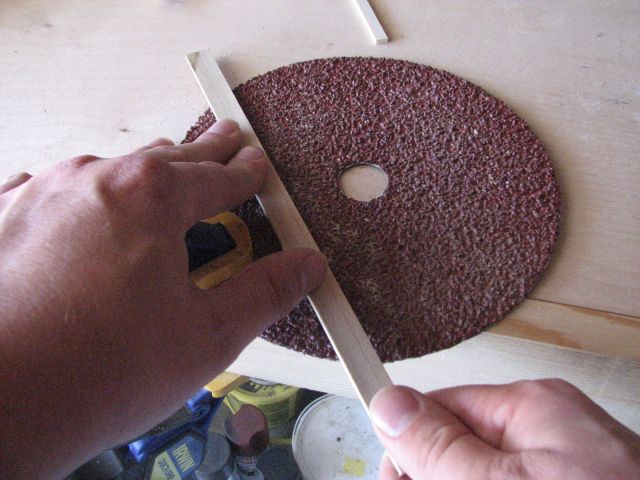
| After all the wood parts were cut profile using a table saw. Eric began distressing all the pieces with a coarse grit sanding disk. |
| The disk is clamped to the bench and the wood planks are drawn over the grit which adds random scratches to the surface. |
| The scratches look like weathered wood grain. Here a smaller piece is distressed the same way. |
| This image gives you an idea what the coarse sanding disk does. Next the planks will be slightly smoothed with some 60 grit sand paper. Stay tuned! |
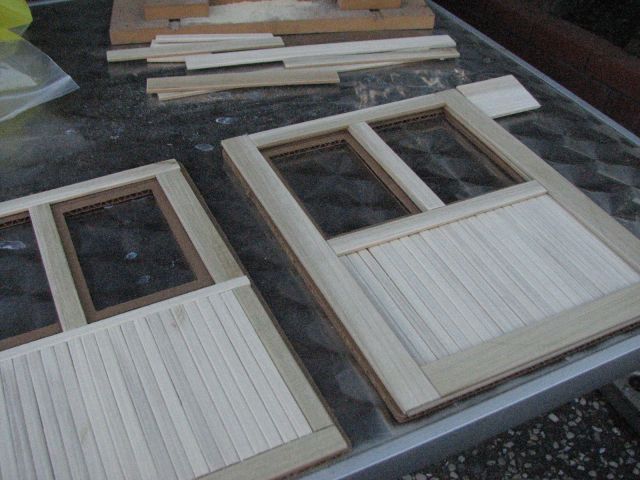
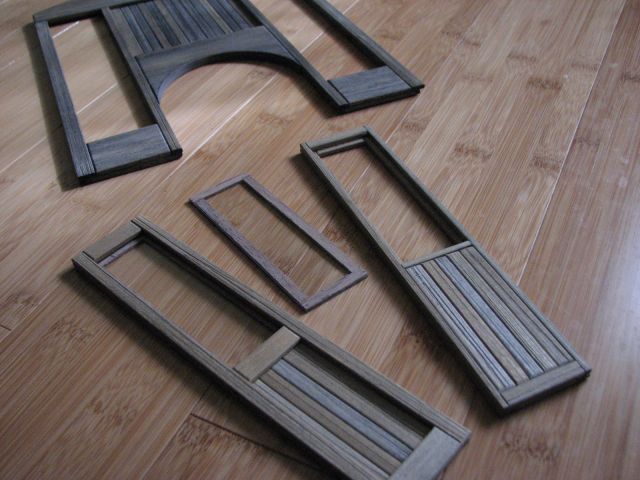
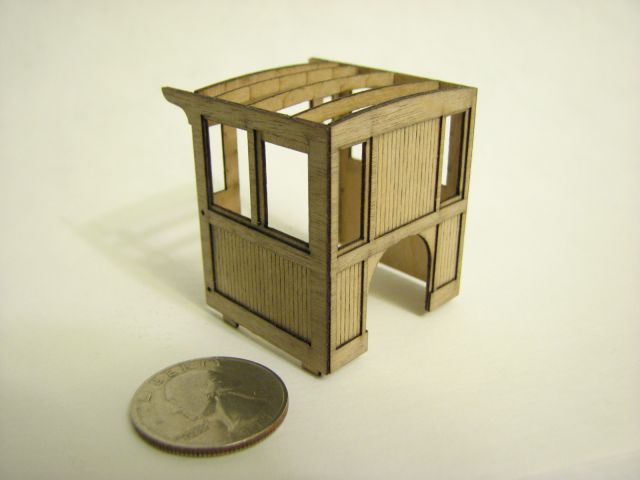
| After all the sanding and distressing of the planks was complete Eric couldn't resist a quick mockup. |
| layer one is shown on the left and both layers are shown on the right. |
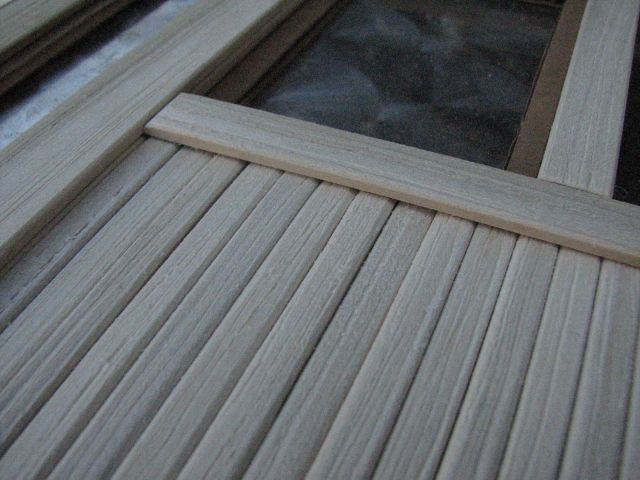
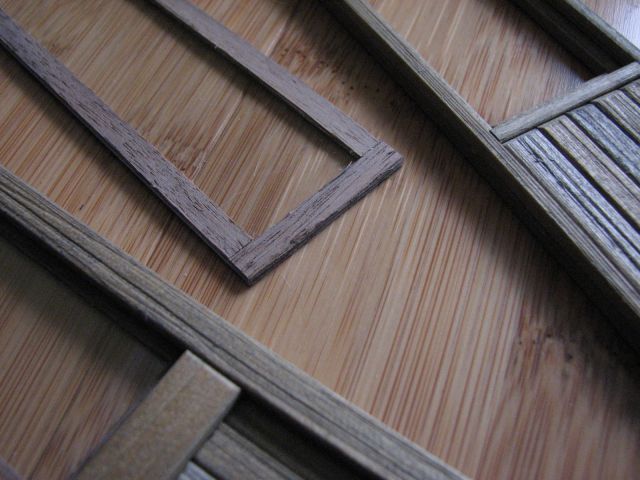
| A close up shows the texture and relief that the final cab sides will have. The next step will be to stain all the material to represent weathered wood |
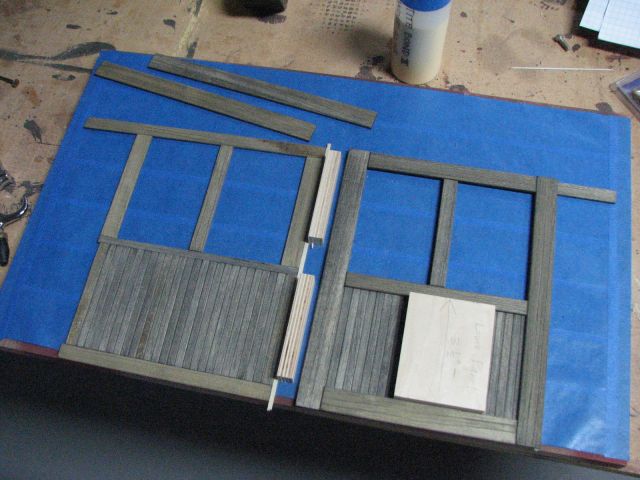
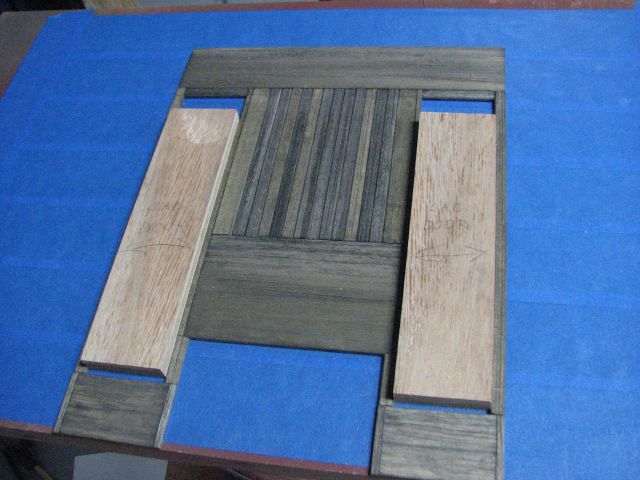
| All the wood has been stained. Layer one of the cab side planks is laid out on a flat board that is covered with blue tape that is sticky side UP. |
| After layer one is stuck to the tape, glue is applied in the areas where the 2nd layer will be laminated on top. Jig blocks are used to align all the planks. |
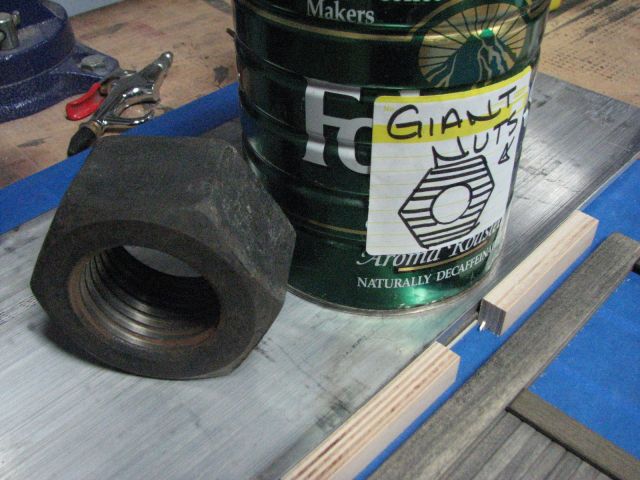
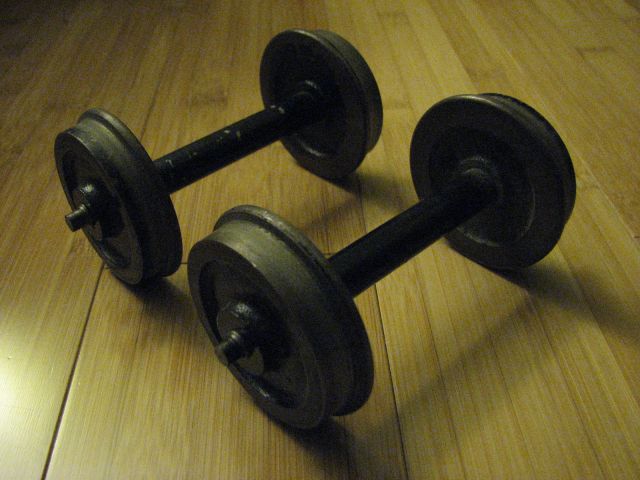
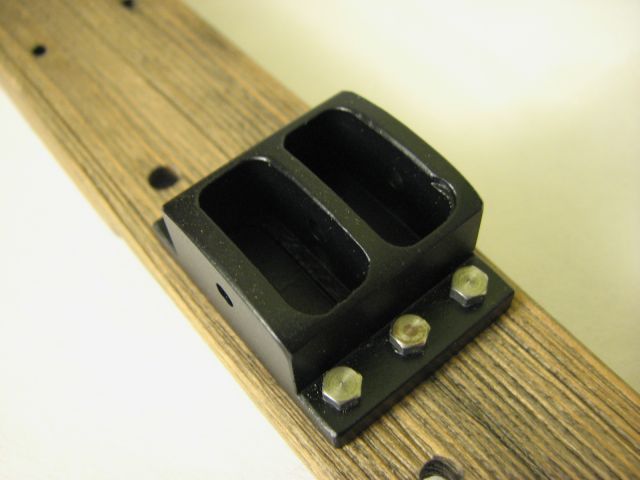
| After all the planks are glued and positioned, the assembly is pressed flat to dry with a thick aluminum plate and some comically large and heavy nuts. |
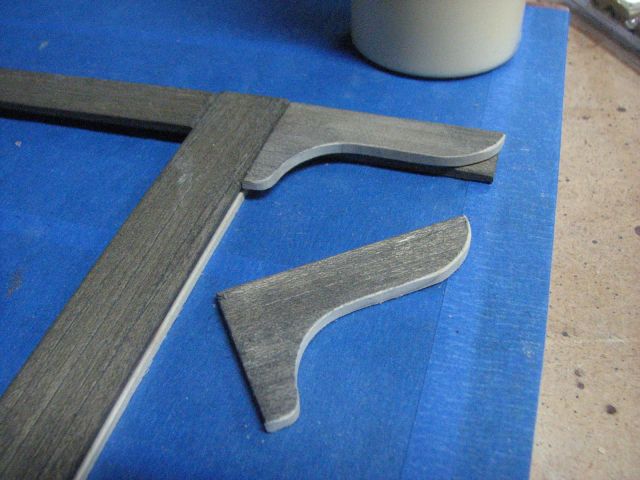
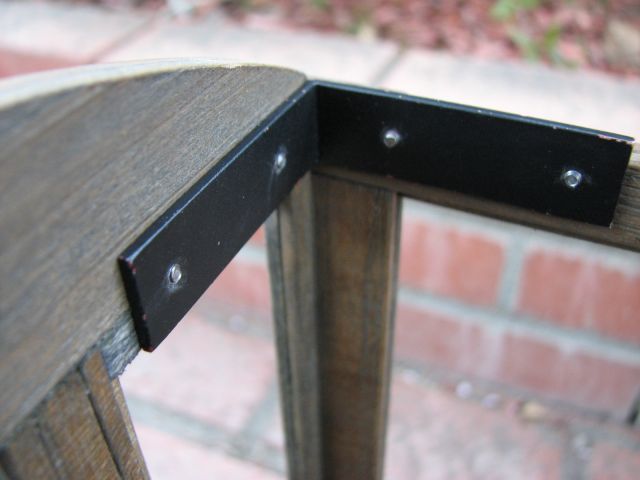
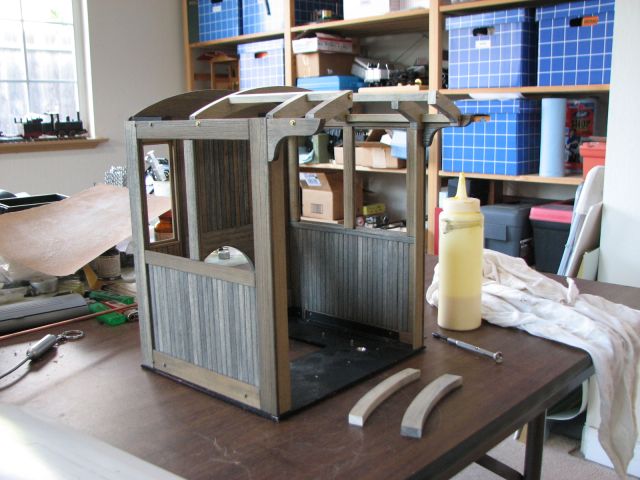
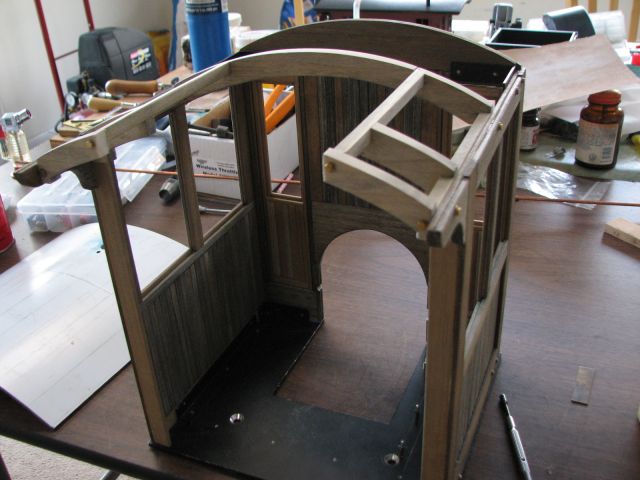
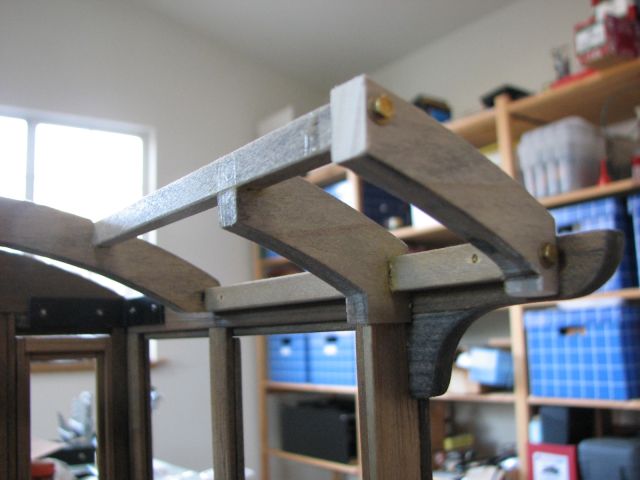
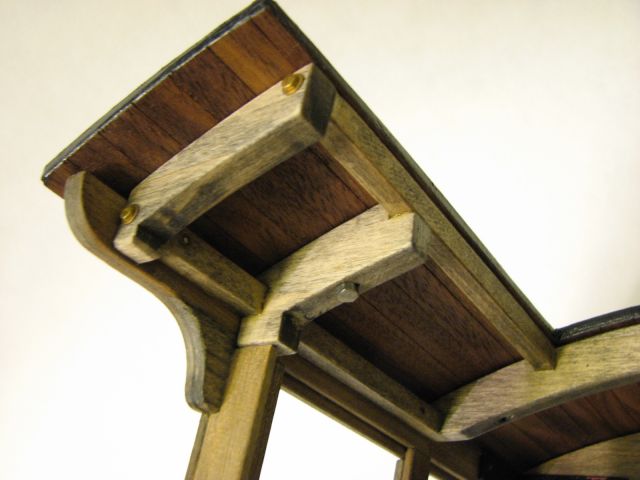
| The cab roof overhang brackets are shaped and dry fit. |
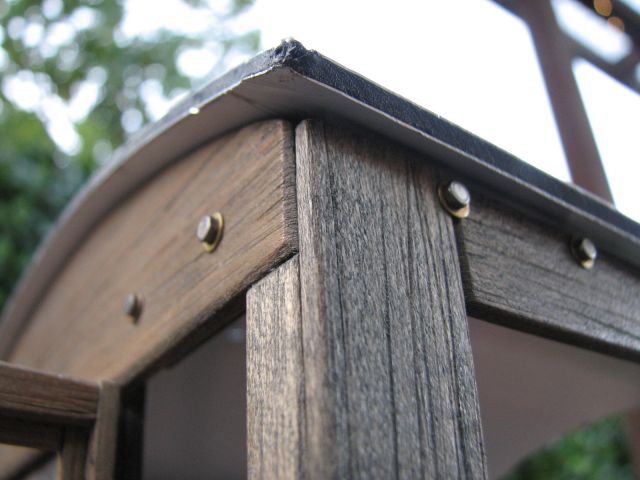
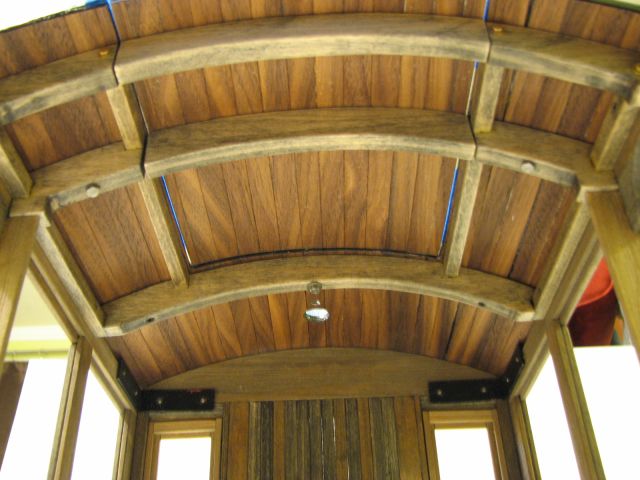
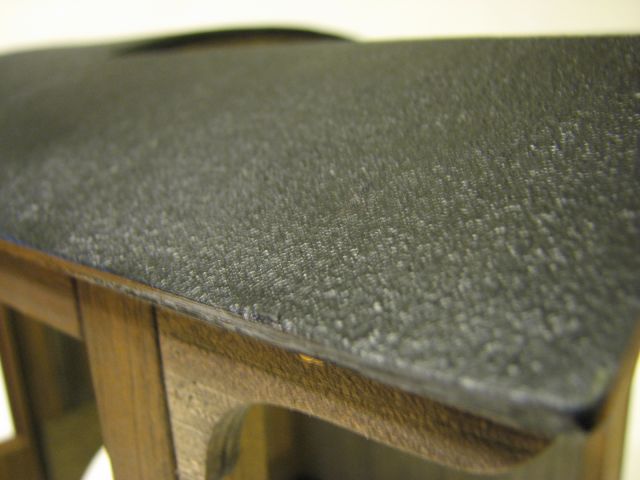
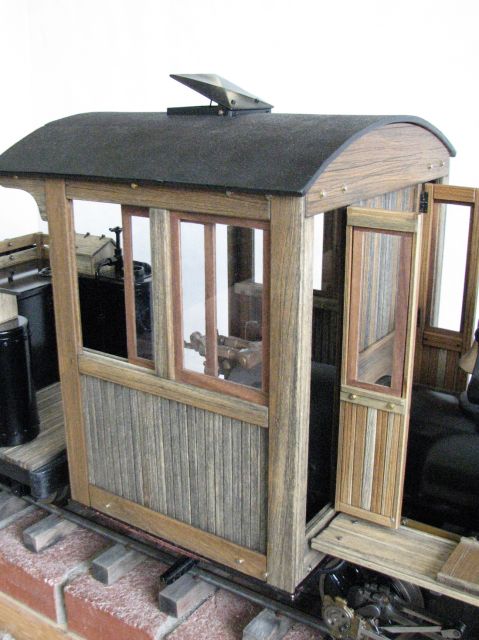
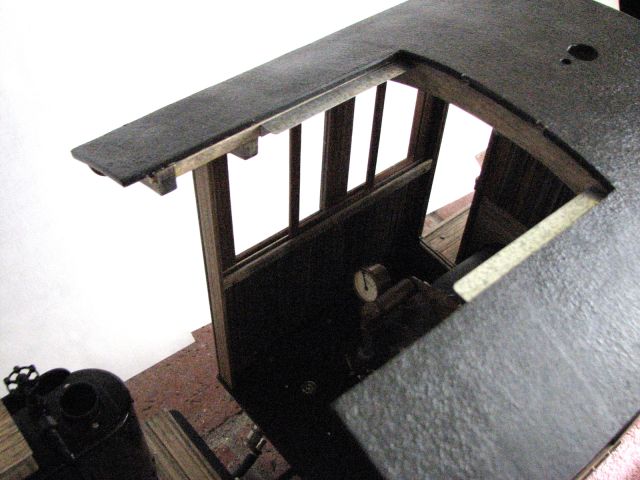
| This gives you an idea of the final collor and texture of the cab. |
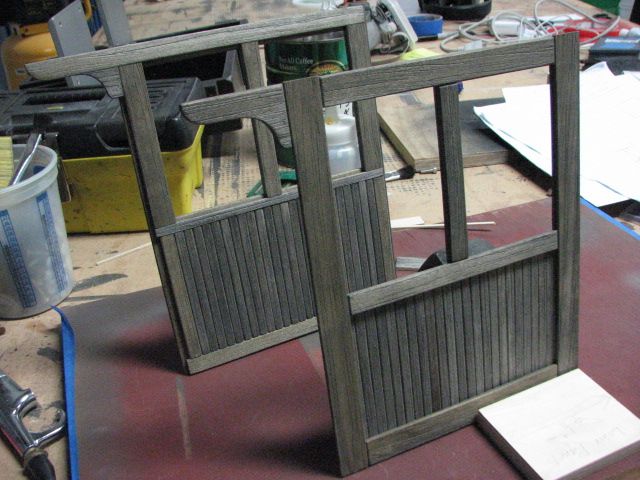
| After the cab sides are dry they are lifted from the board the blue tape is peeled from the back. I propped them up on the workbench for a better look. |
| The first layer of planks is layed out for the front wall of the cab. |
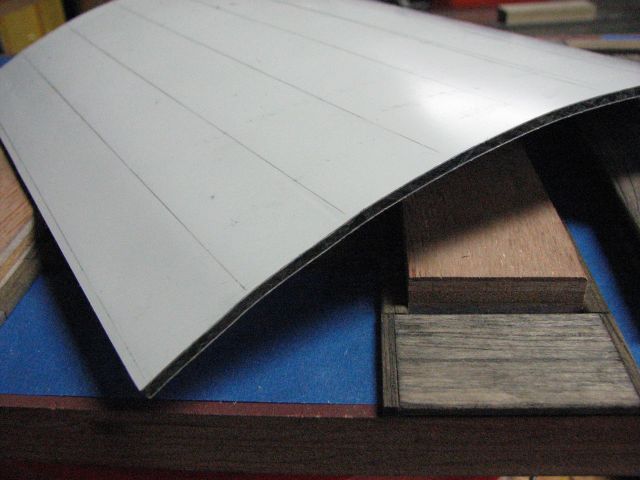
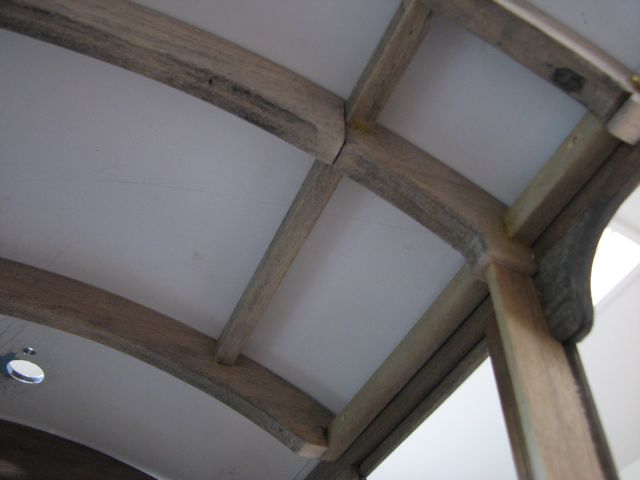
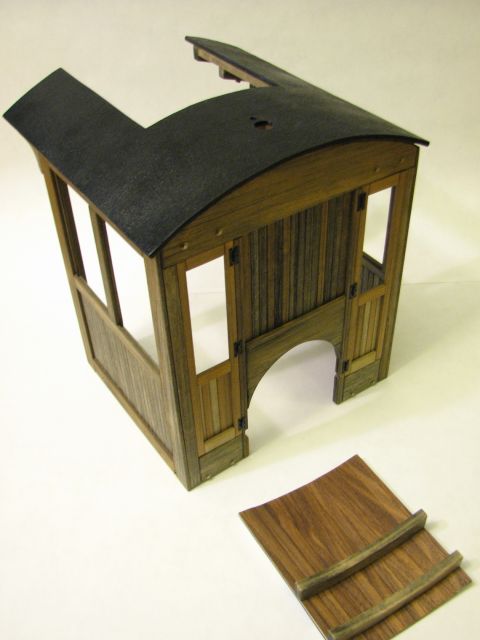
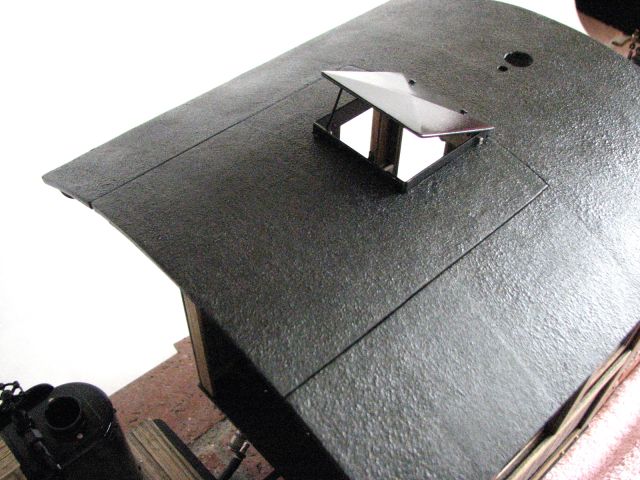
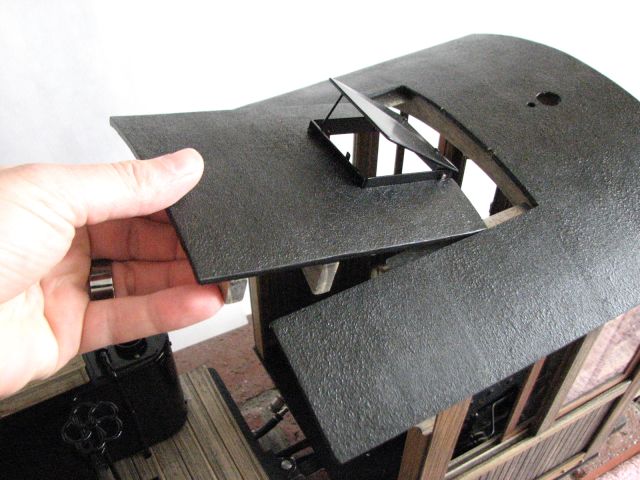
| The cab roof has been made. I decided to use a lightweight material called Diabond for the roof. It is a laminated material using plastic and aluminum layers. |
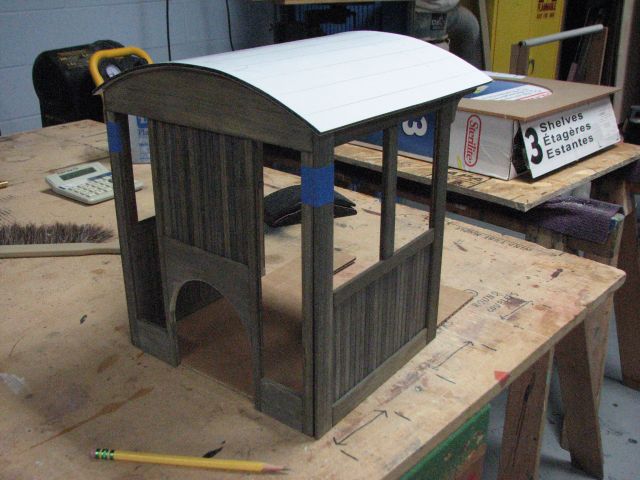
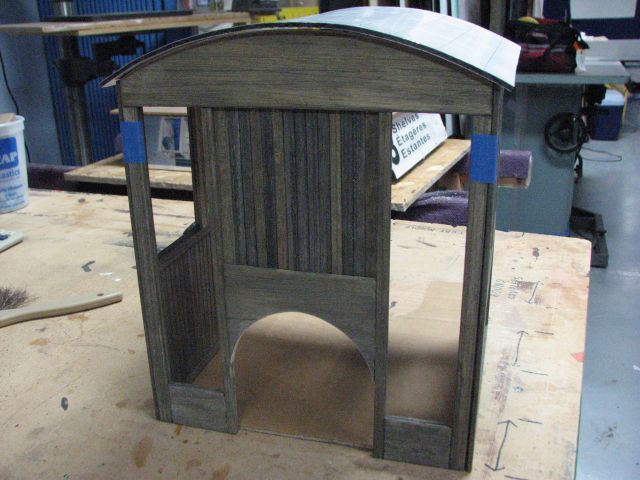
| The cab roof is used to scribe the correct arc on the front cab wall. The arc for the boiler is scribed from a cardboard template made from the boiler itself. |
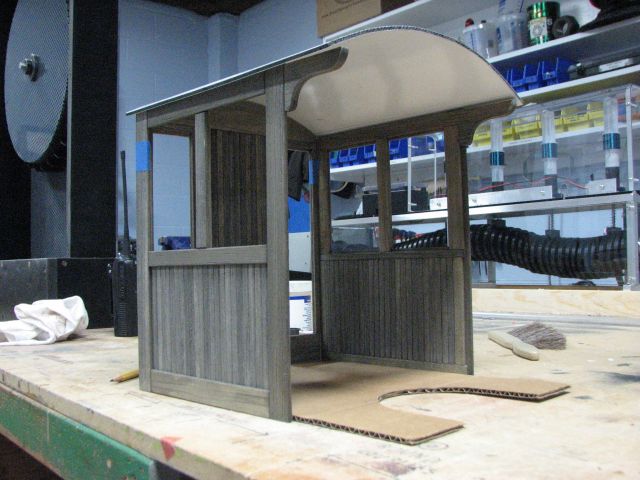
| The assembly is mocked up on the workbench. |
| The arcs are rough cut with a band saw and then fine tuned with a large spindle sander. |
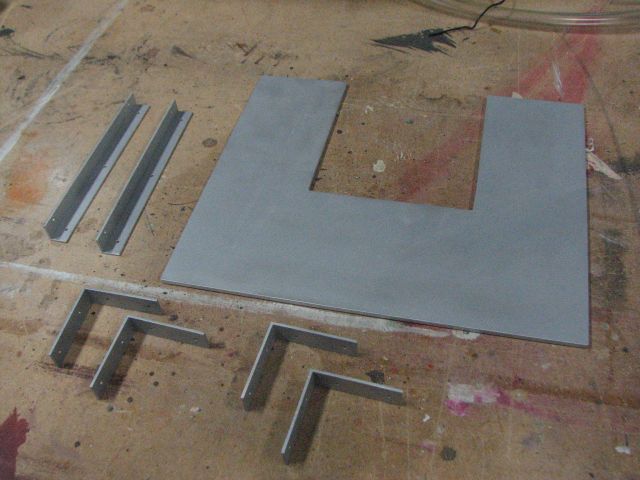
| The next step is to cut the cab floor from aluminum plate... |
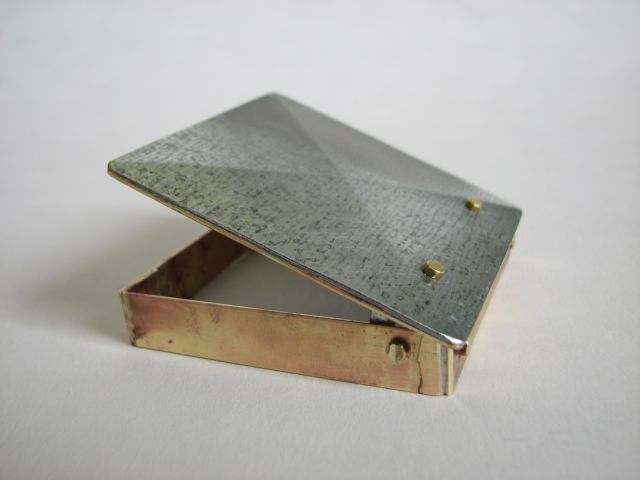
| Metal parts for cab floor and corner brackets. |
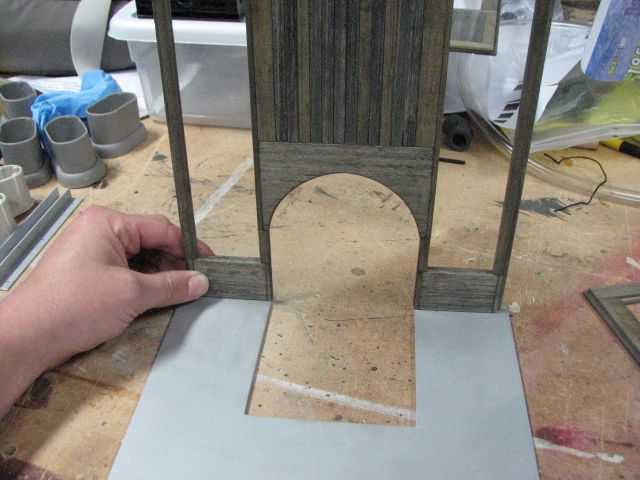
| The cutout in the floor for the fire-box corresponds to the opening in the front cab wall. |
| Corner bracket. |
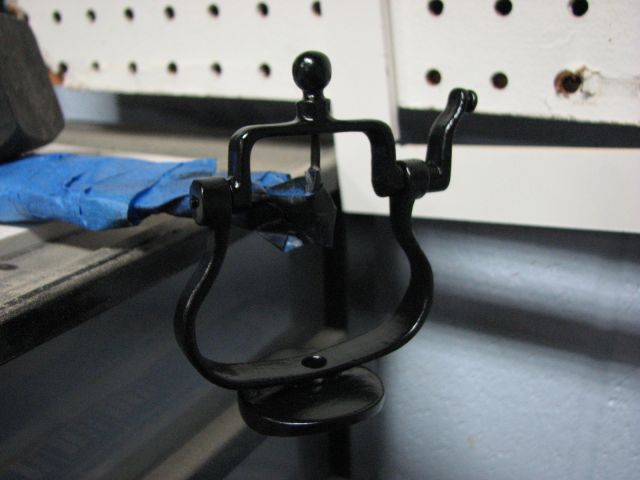
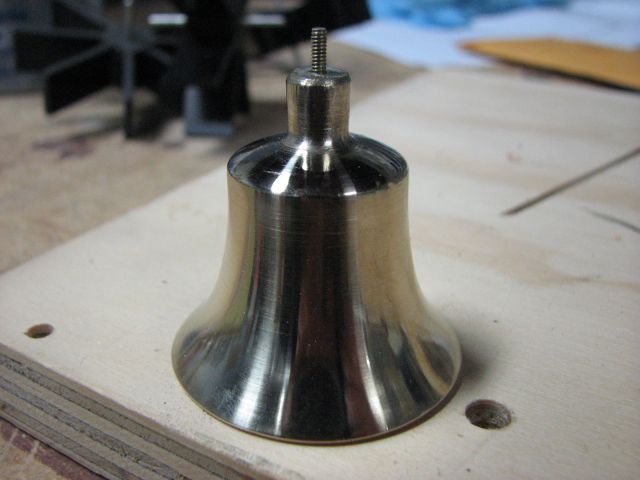
| Eric scored some nice bronze castings for a 1:8 scale bell on eBay. The bell yoke and hanger have been cleaned up and painted semi-gloss black. |
| The bell was spun in an electric drill while grinding off the mold lines with files, then progressively finer grits of sand paper, and finally a little polishing compound. |
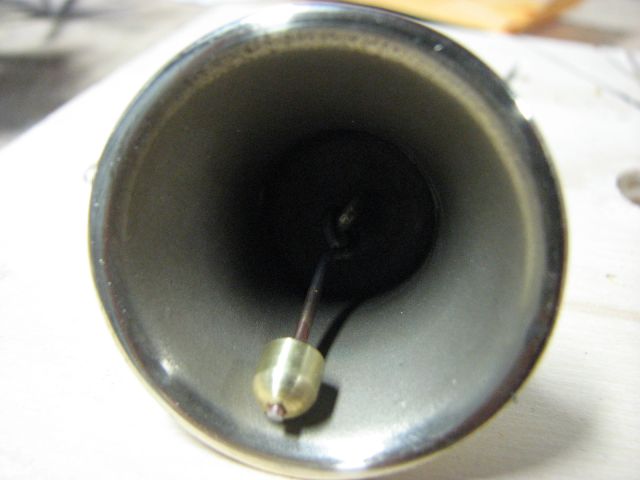
| Henner machined the clapper for the bell. |
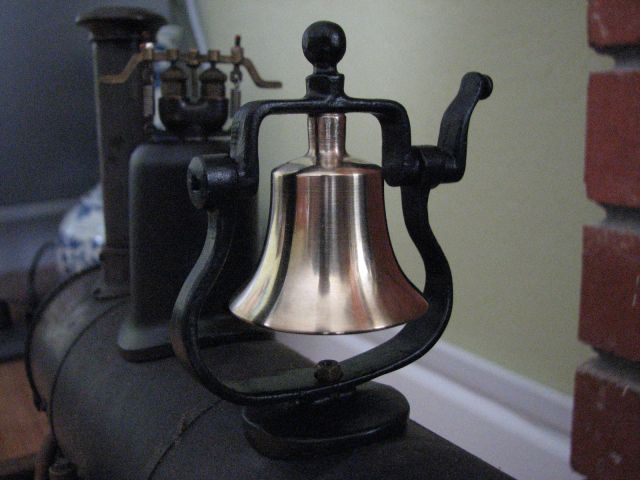
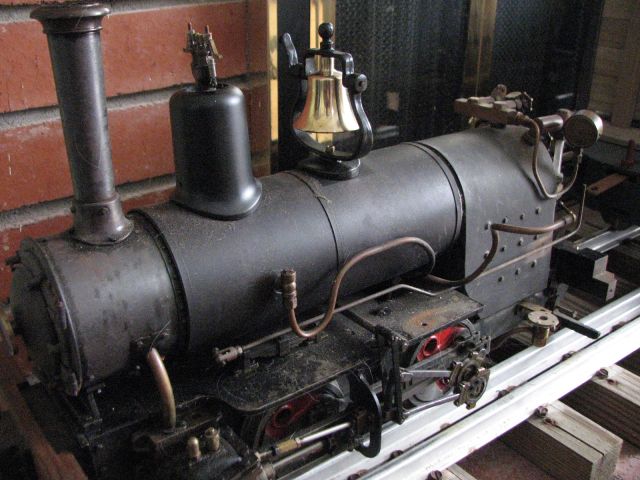
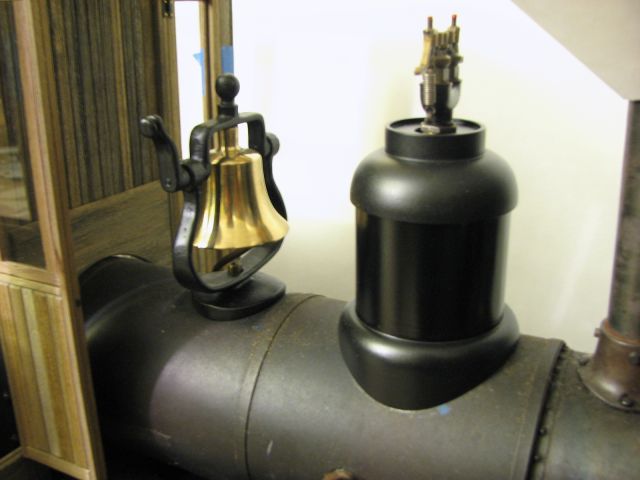
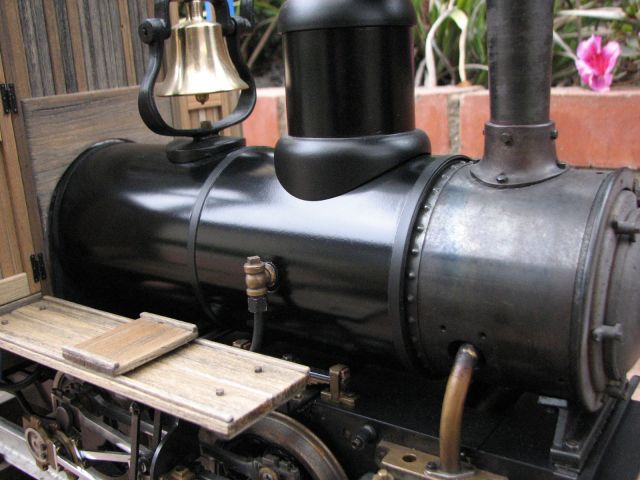
| The new bell mounted on the boiler. The base had to be re-contoured a bit for the small boiler diameter. |
| WOAH! thats one big bell. Time to start scaling up some of the other details to match. |
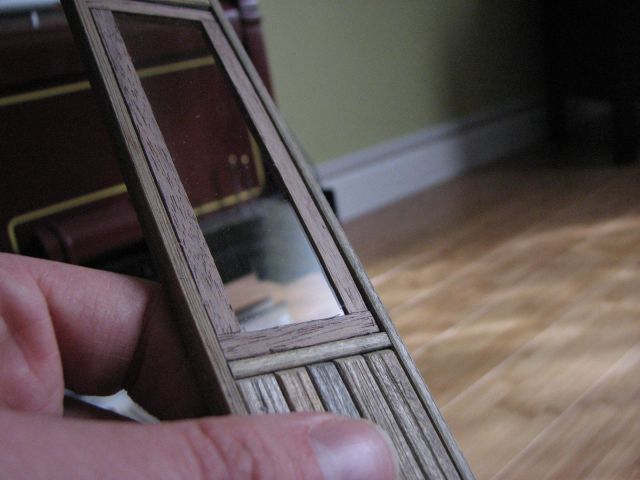
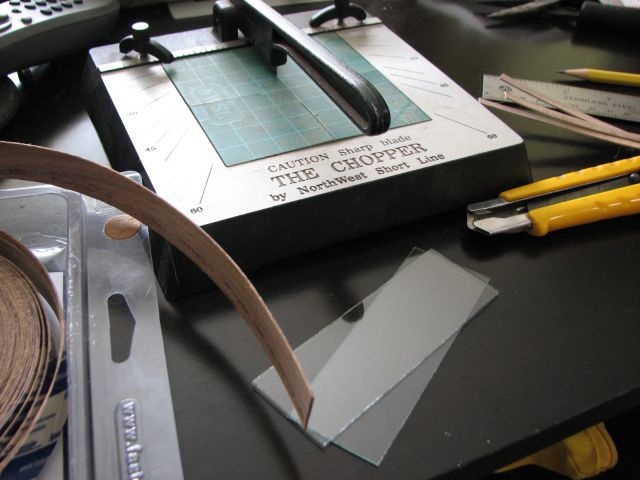
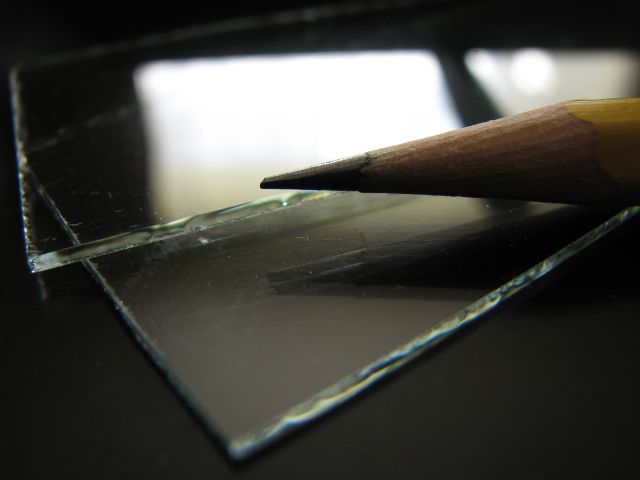
| The cab doors were built up in the same way as the cab walls. Thin polycarbonate "glass" with walnut frames are made to fit in the door windows. |
| IMG_9007.JPG |
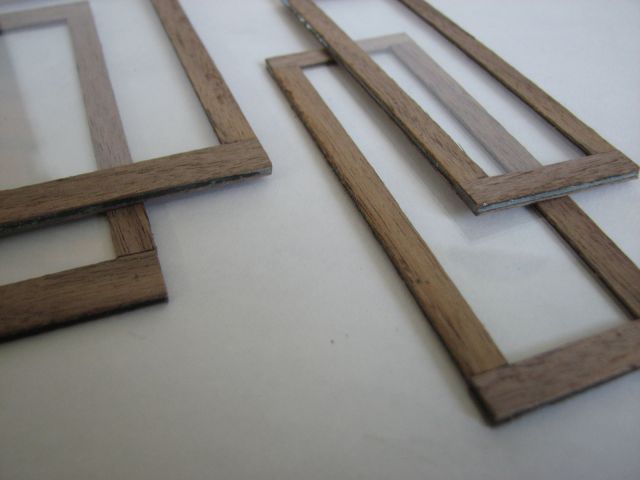
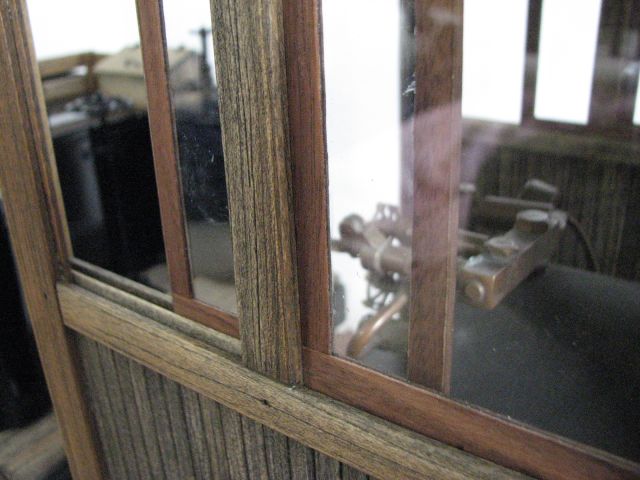
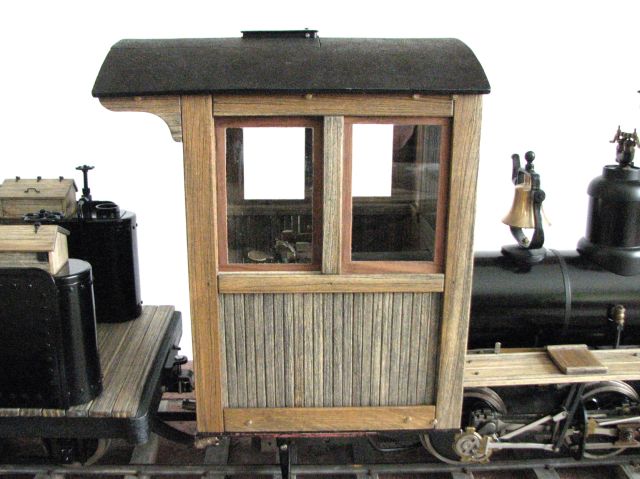
| Here you can see the "glass" installed in the door. |
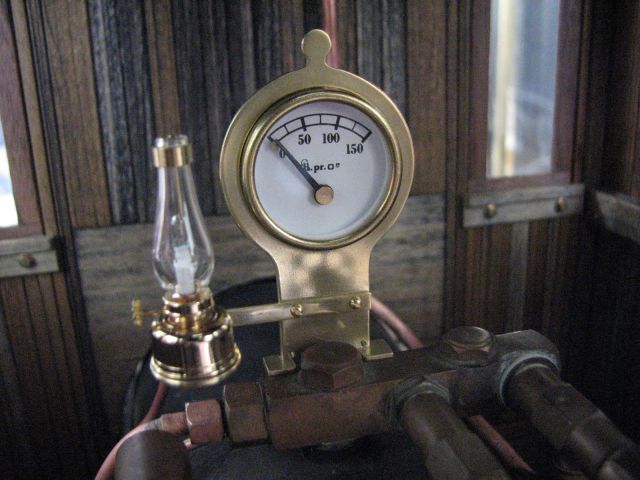
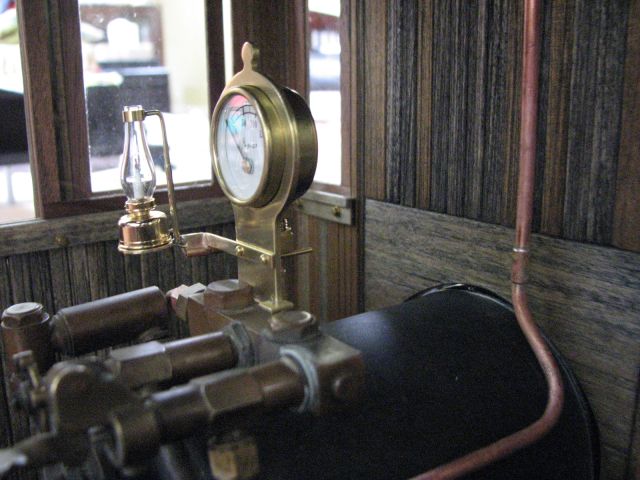
| The cab light for the locomotive will be this sweet little oil lamp from the doll house shop. Expensive little bugger because it is real brass and hand blown glass. |
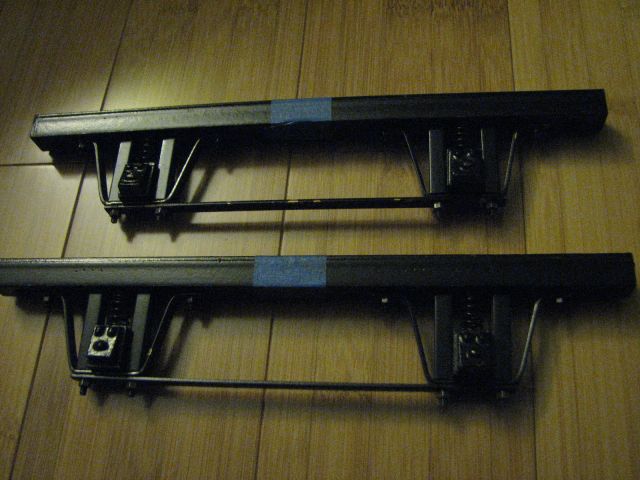
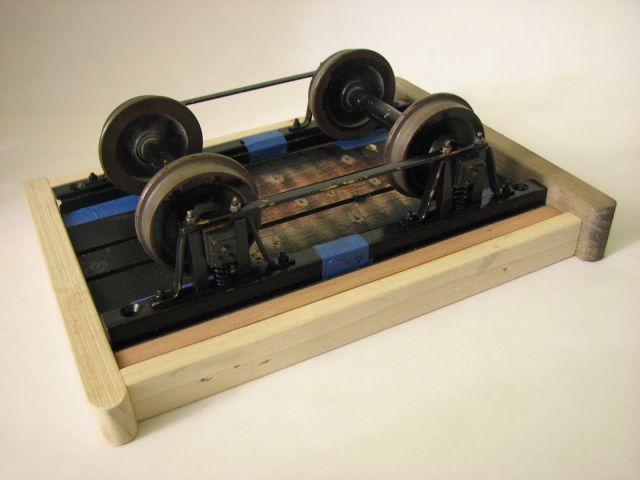
| Starting to dig out some of the bits I made years ago for the first bash of the loco. These are the tender side frames. The journals are ball-bearing. |
| Henner machined the nice wheels from iron castings and steel drill rod for the axles. |
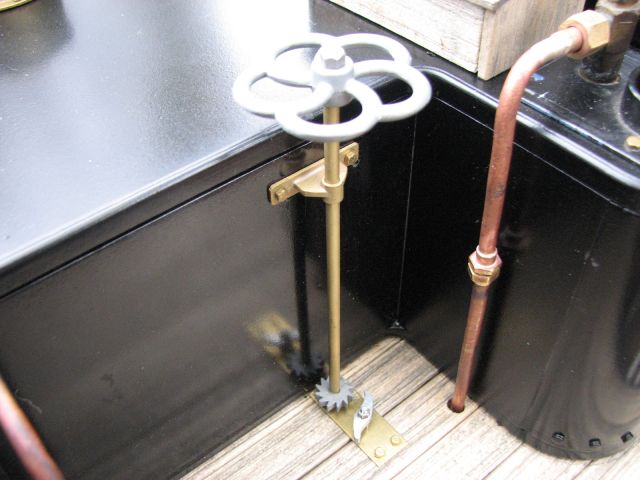
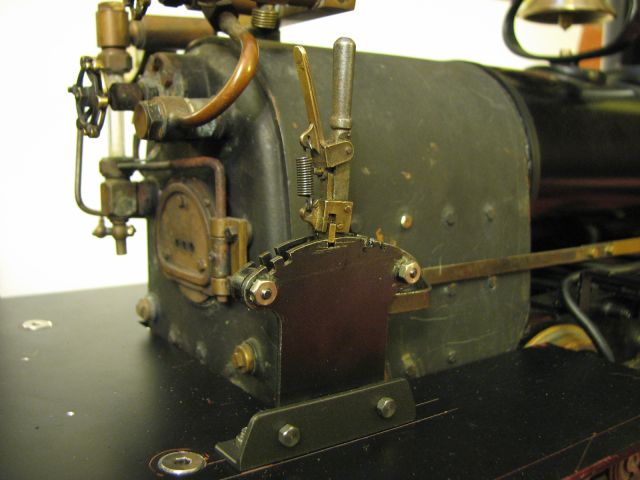
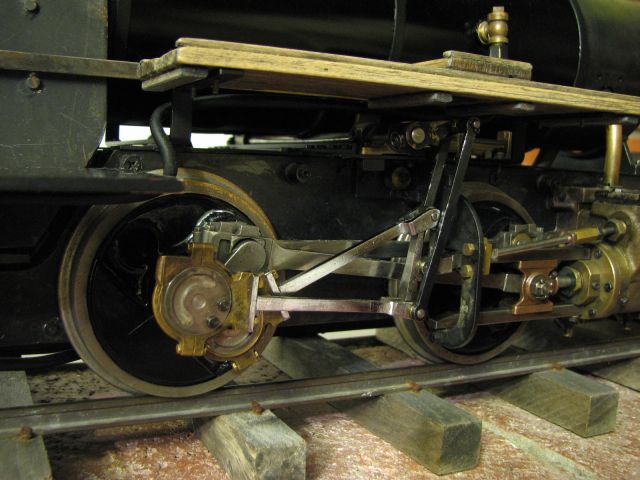
| The Johnson bar. |
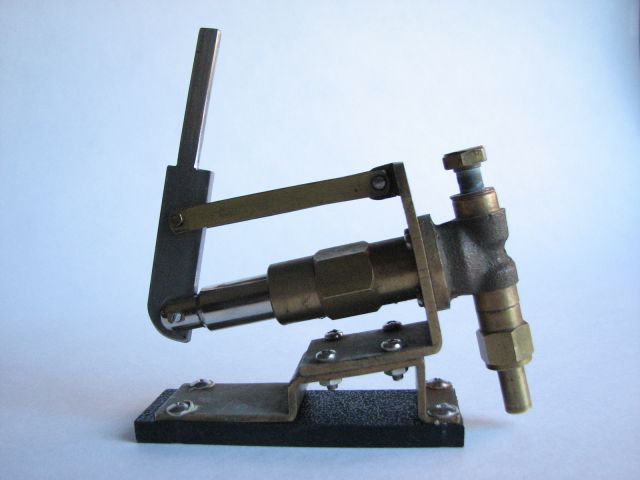
| A cool little piece. The safety valve. Valve of this type were outlawed in the U.S. because hot rodding engineers would dangerously boost boiler pressure by hanging weights on the lever arms. |
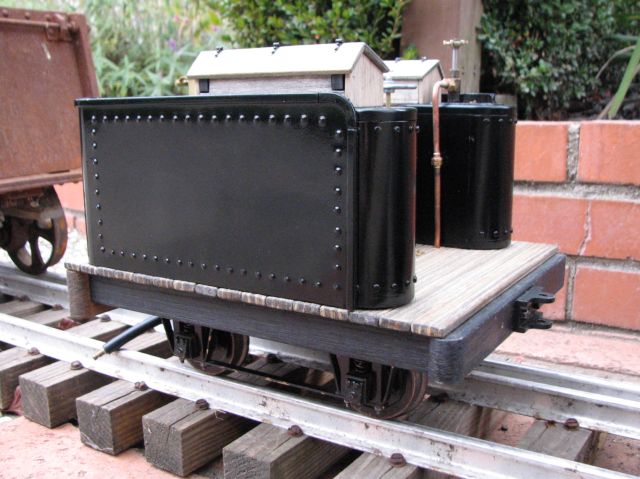
| A little plastic fabrication project. Eric solvent welded a new tender tank for the locomotive from black ABS plastic. |
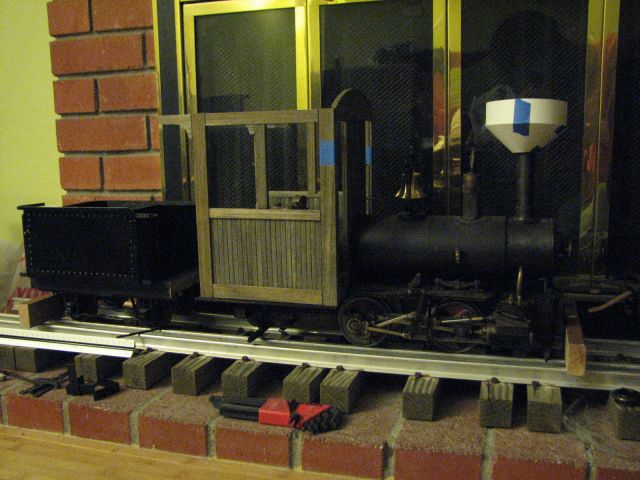
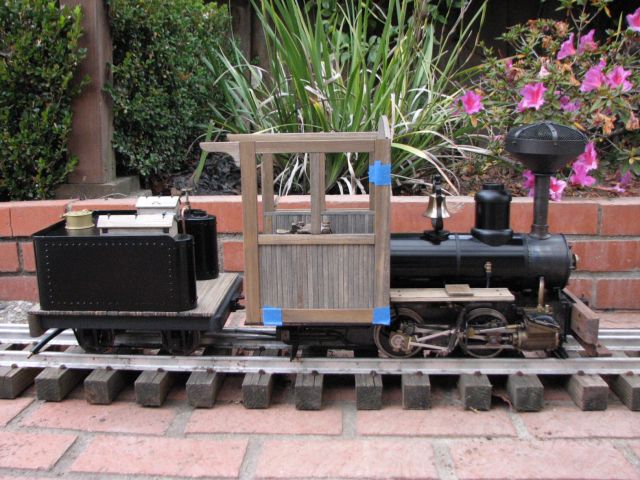
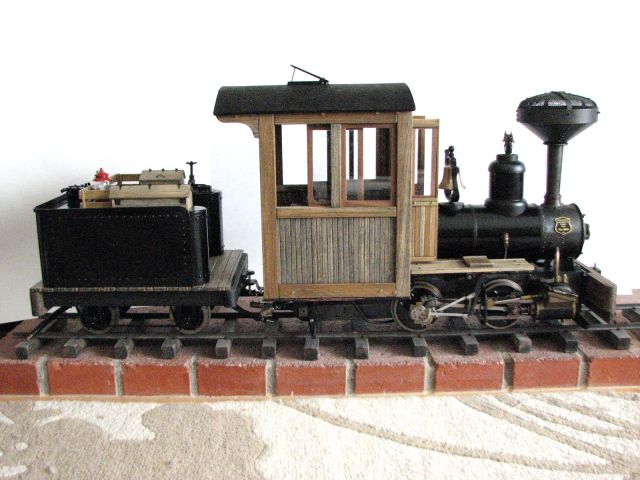
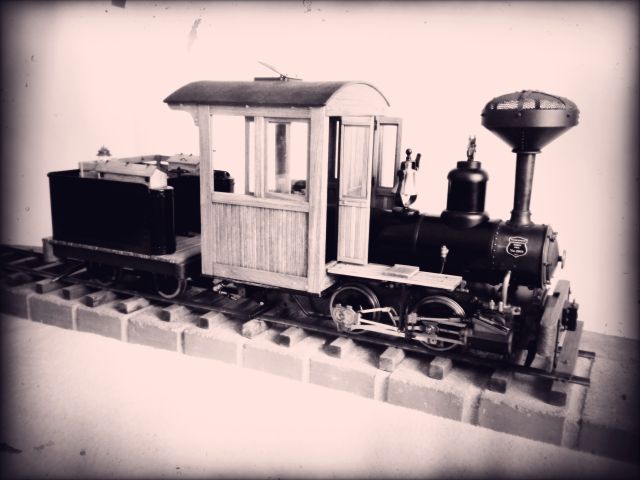
| A quick and dirty mockup of the loco to have a look at the overall proportions. As you can see Eric also mocked up the spark arrestor in paper. |
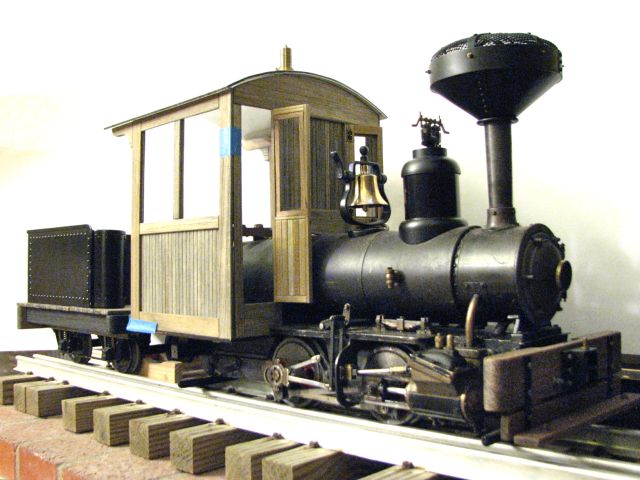
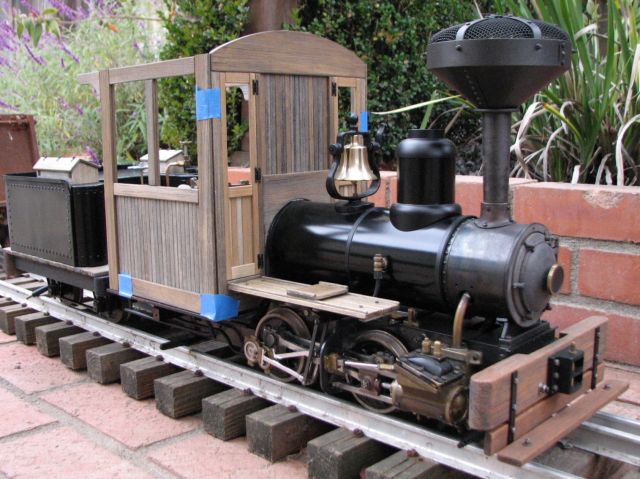
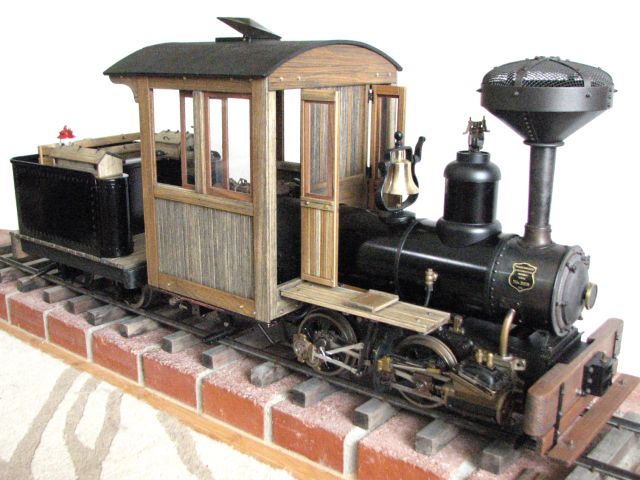
| Starting to look like a North American logging loco. |
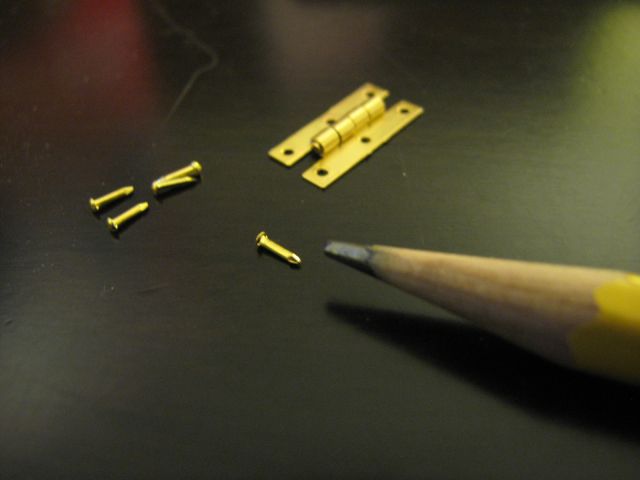
| Hanging the cab doors on tiny hinges with tiny nails. |
| Don't sneeze. |
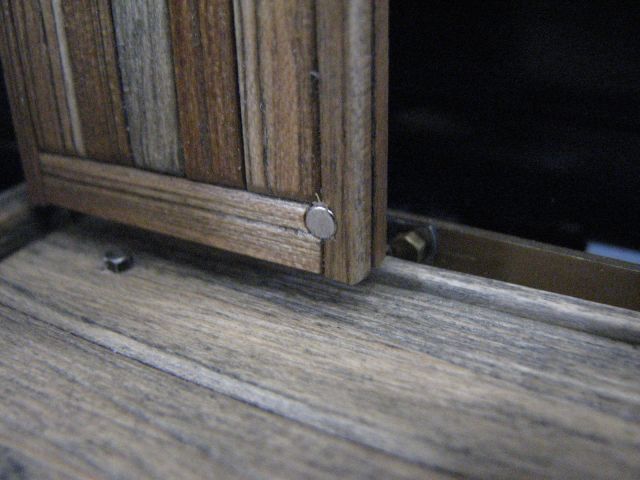
| A couple layers of blue tape around the door put a fine and even gap around the door it is free-swingin' without scraping. |
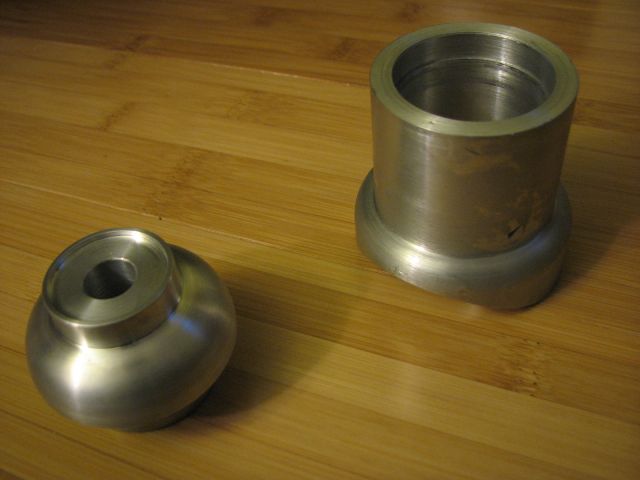
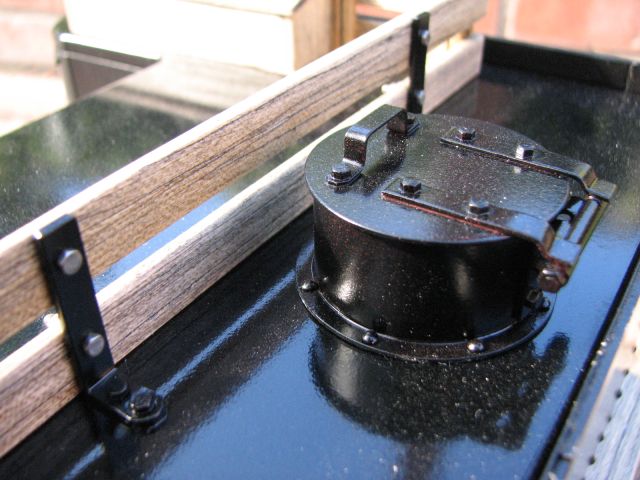
| Dennis Mead machined this nice dome from aluminum. |
| New steam dome. |
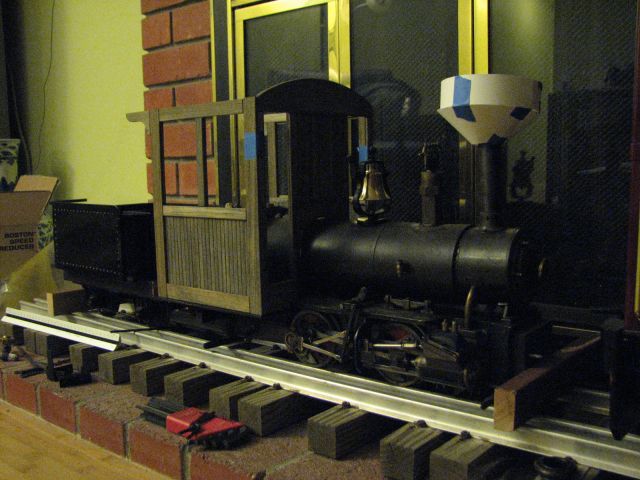
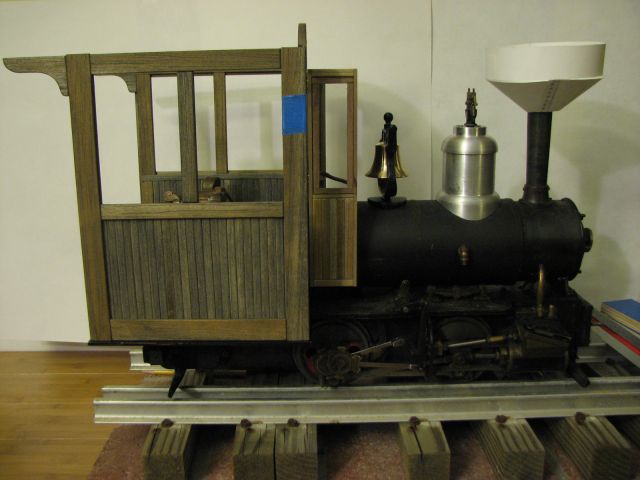
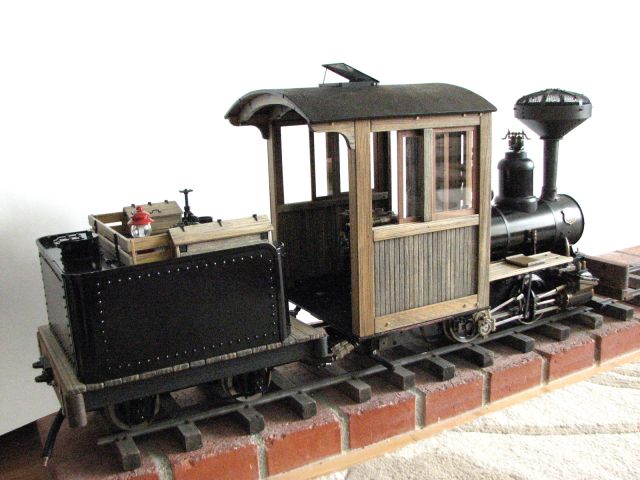
| Another quickie mockup. New cab doors, new steam dome = awesome! Making that spark arrestor in brass is one of the next tasks. |
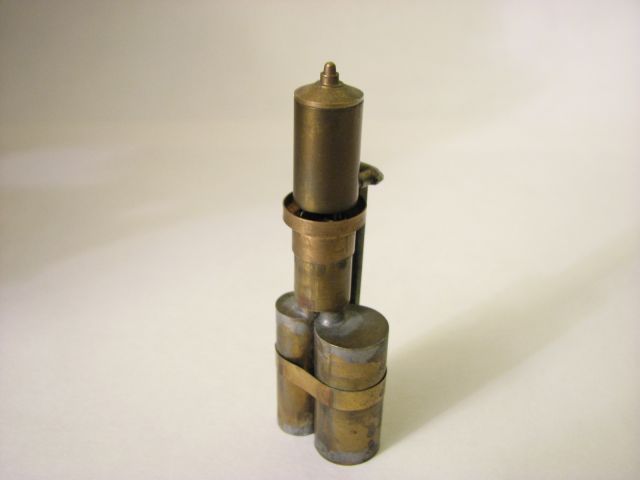
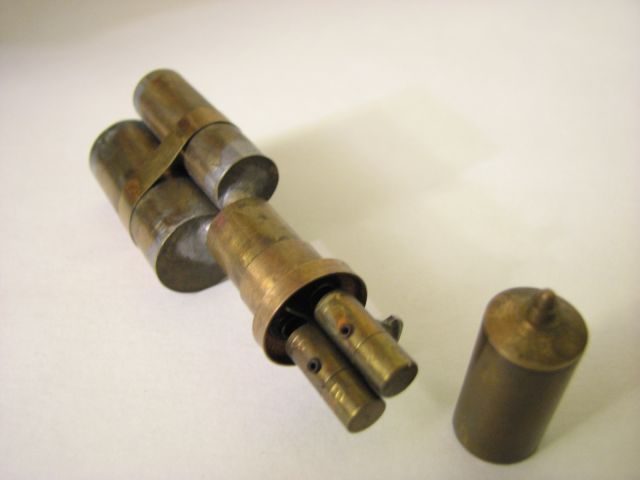
| Poking out of the cab roof will be this one-of-a-kind custom steam whistle made by master fabricator Larry Bangham. |
| Here you see the entire whistle. The two "tanks" are resonators that give the whistle a deep tone. |
| Larry called this a " Trick Whistle" because inside the large scale whistle are two smaller whistles that provide a spectacular harmonic tone. |
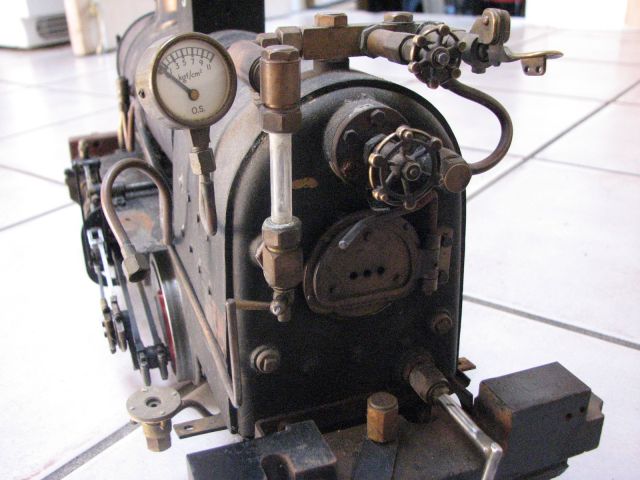
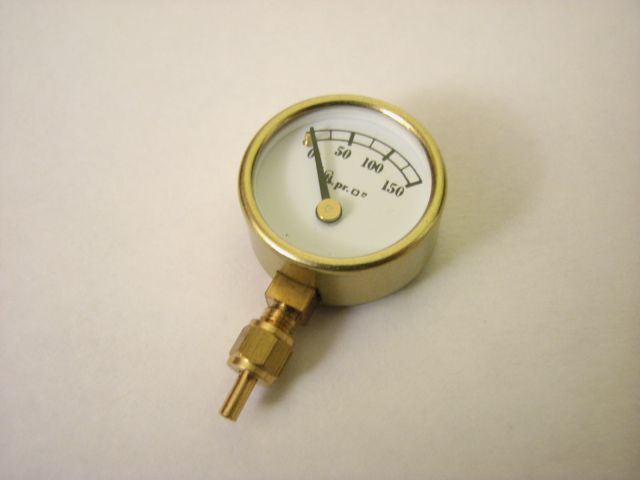
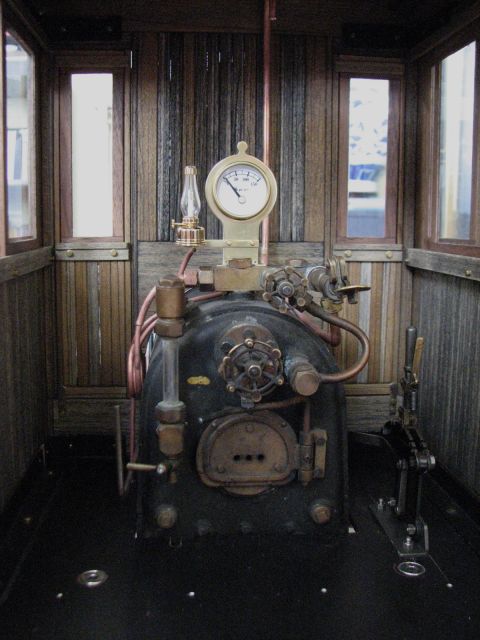
| The original pressure gauge from O.S. Engines only reads in bars so an english made model that reads in PSI will be installed. The gauge is 1" diameter. |
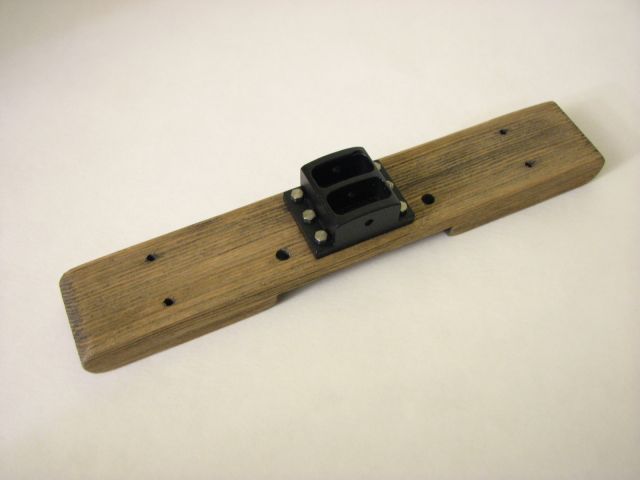
| The new pilot beam made from a piece of clear vertical grain fir. Unfortunately the coupler mount holes are .125" off center so Eric will be fabricating a new one. |
| David machined this coupler pocket in 2001. The small nick in the upper pocet is due to a machining error and it is being left in place for historical purposes. |
| The tender frame has been widened to the correct width for a 30" gauge engine. |
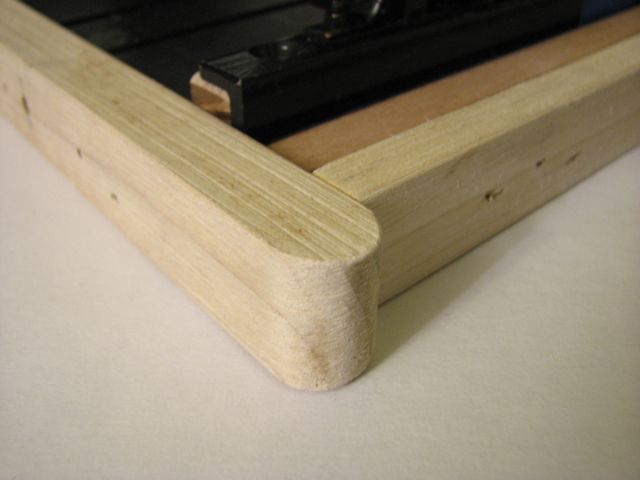
| The original tender frame was made from marine grade plywood. with cherry sides and ends. It now has poplar frame members and a VG fir end beam. |
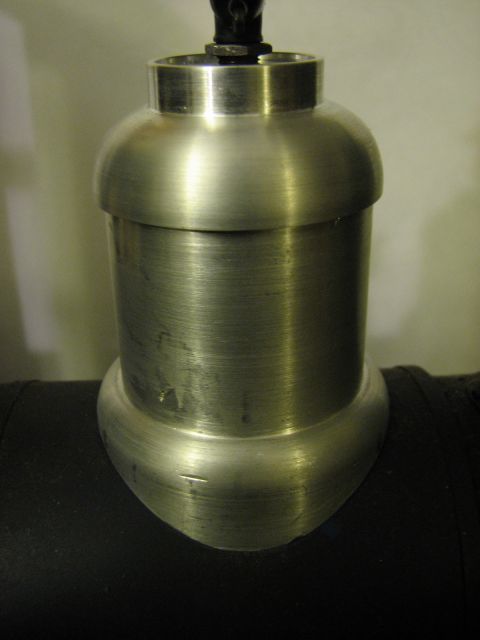
| The new dome has been cleaned up and painted. |
| Starting to take shape. |
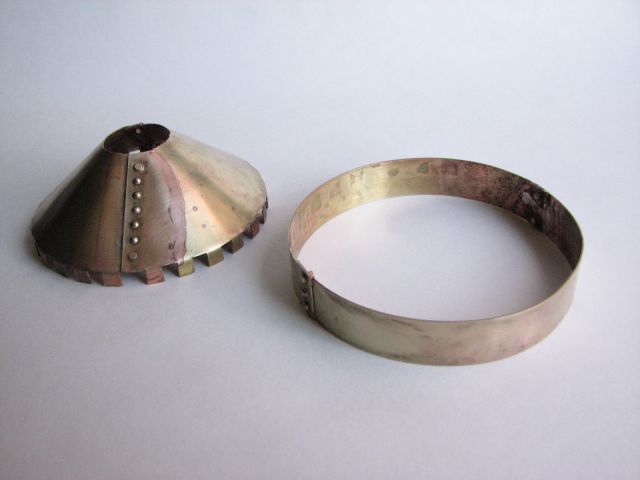
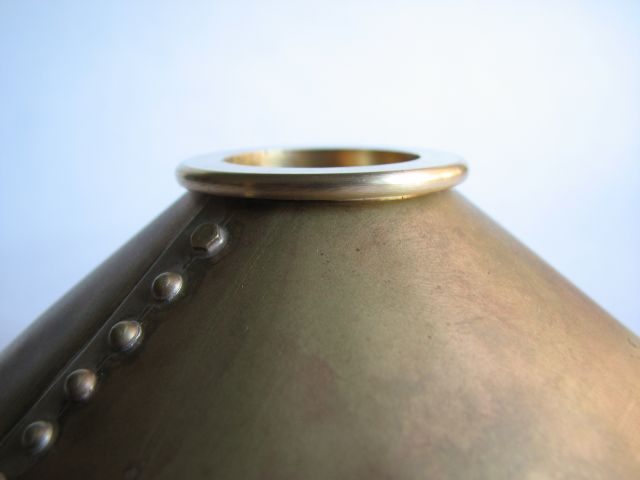
| Using the paper spark arrestor as a pattern. The cone shape was laid out on brass sheet. after some anealing, drilling, bolting and soldering, the new spark arrestor is under way. |
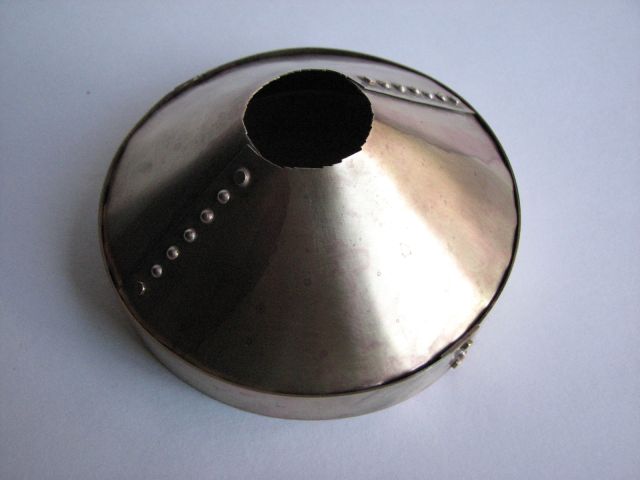
| Brass escutcheon pins are used to simulate rivets. A nibbler was used to cut the sheet brass which left a jagged edge in the base hole. Eric will clean this up on a spindle sander. |
| The screen and it's support bars still have to be made as well as an adapter to attach the cone to the smoke stack. |
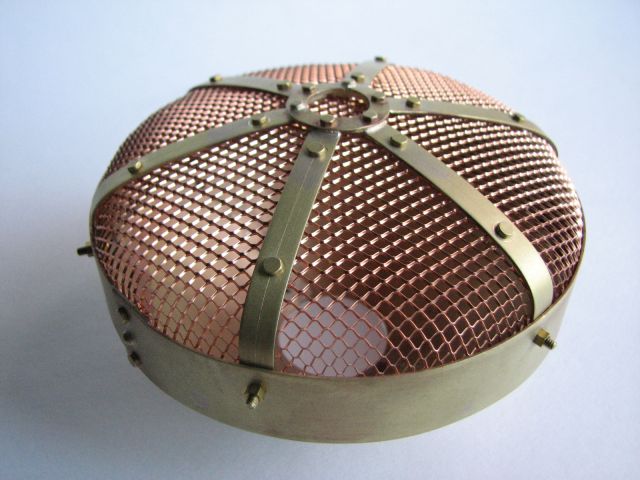
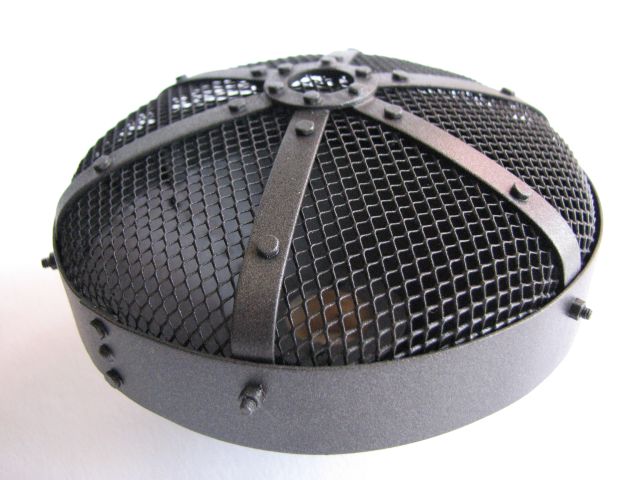
| Here you see the spar arrestor almost complete. The screen has been formed and installed. |
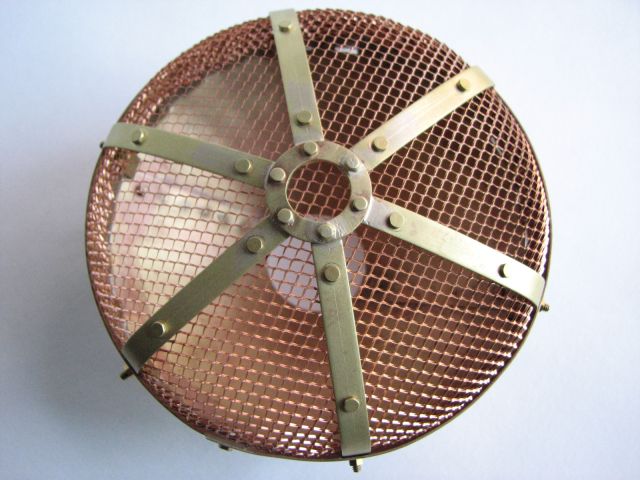
| The support bars for the screen were anealed and formed to the same shape as the screen Dennis Mead made the small ring in the center that the support bars attach to. |
| The screen and support bars are all bolted into the cone with 2-56 screws and nuts. Washers also hold the screen on the under side. |
| The last thing to do is sort out the adapter piece that will allow this assembly to be installed on the Krauss stack. |
| This former was shaped on a drill press using rasps and sand paper. The anealed copper screen was easily shaped around it. |
| Henner suggested using a bolt on "collar" to attach the cone to the adapter. The top hat shaped piece is the adapter. On the right you see the collar. |
| When the two parts are bolted together thy sandwich the cone of the spark arrestor. |
| The is the assembly bolted together. Here you see the collar clamping down on the inside of the spark arrestor cone. |
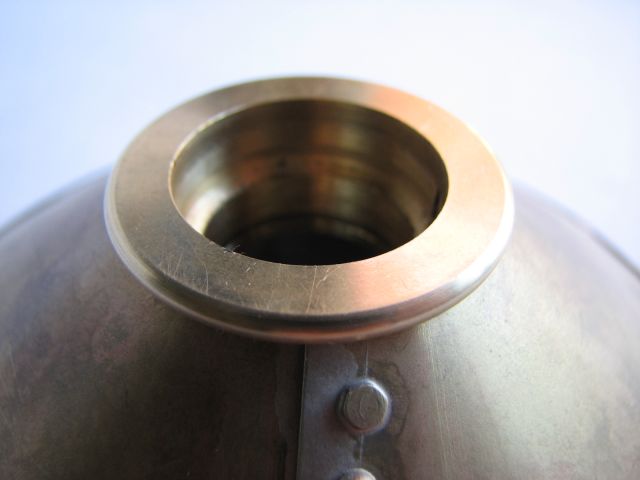
| This is what the adapter looks like on the outside of the cone (shown upside down.) |
| One again the adapter. This will literally slip right on to the stock Krauss smoke stack. |
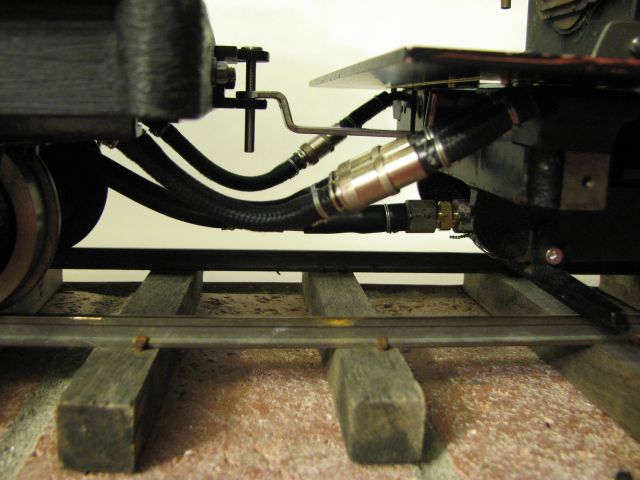
| A quick diversion to the hand pump. The lever broke years ago. David found a piece of stainless flat bar and began making a lever which Eric has now finished. |
| The hand pump is screwed to a plastic base which will be solvent welded inside the tender tank. |
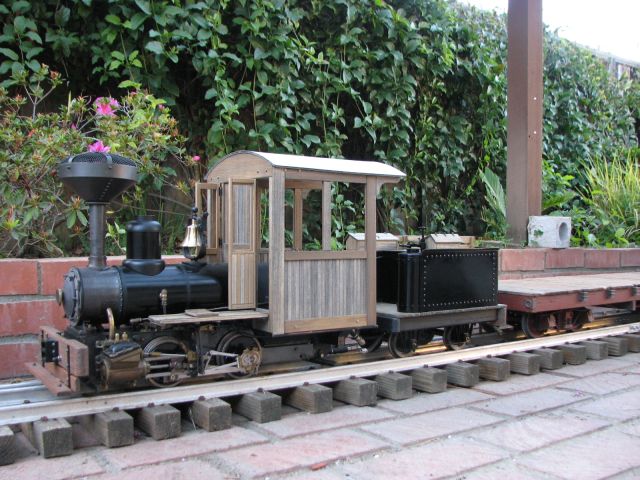
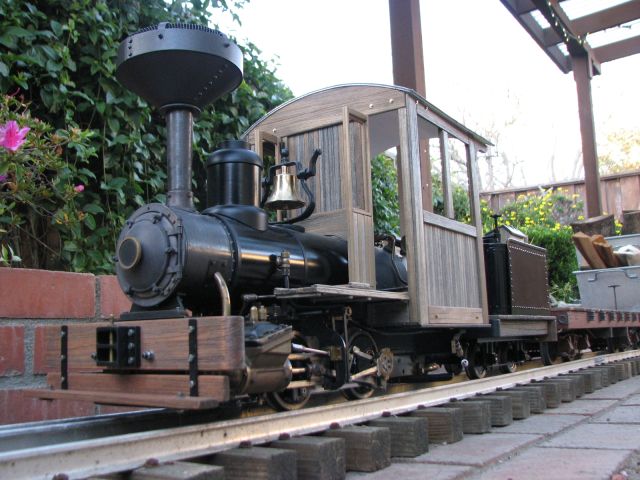
| A base coat of black paint has been applied to the spark arrestor and Eric could not resist a quick mockup picture to see what the whole thing looks like. |
| Another look at the mockup before removing the boiler so that the chassis and boiler jacket can be painted and all the plumbing can be sorted out. |
| Standard 12 oz U.S. soda can for scale. |
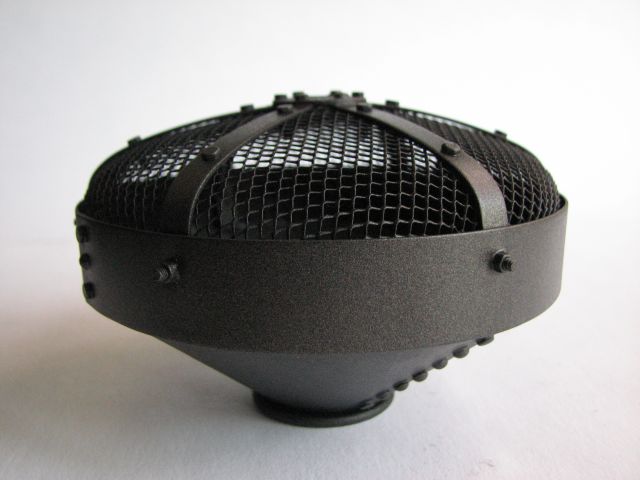
| The spark arrestor is complete with a dusting of graphite colored engine enamel. |
| Finished spark arrestor. |
| Again, the finished Spark arrestor. |
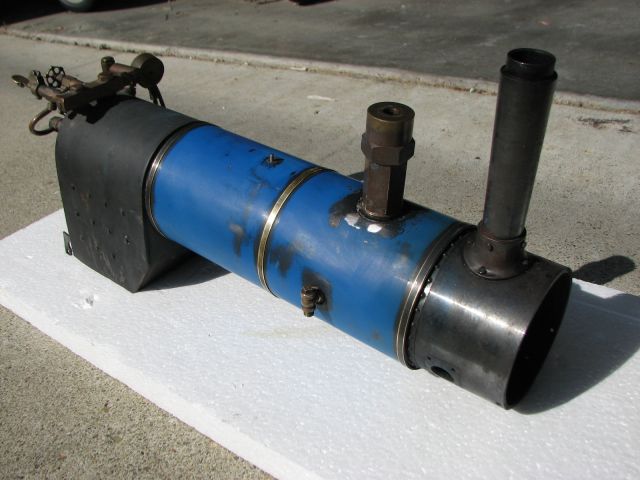
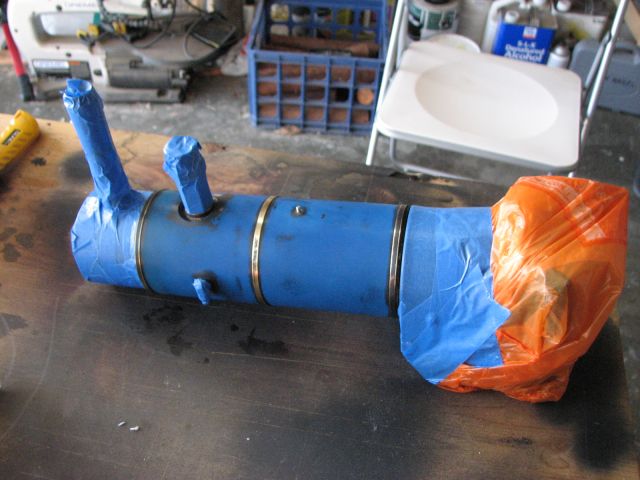
| The boiler has been removed from the chassis so paint and plumbing work can begin. |
| The boiler is prepped for paint. The black barbeque paint that Eric applied ten years ago is wet sanded off revealing the Thomas blue of the stock paint job. |
| Another view of the boiler. |
| The boiler is masked, cleaned and fully wet sanded for primer and paint. |
| The boiler receives a fresh coat of gloss black paint. Notice the Bill Harris Shay in the background. |
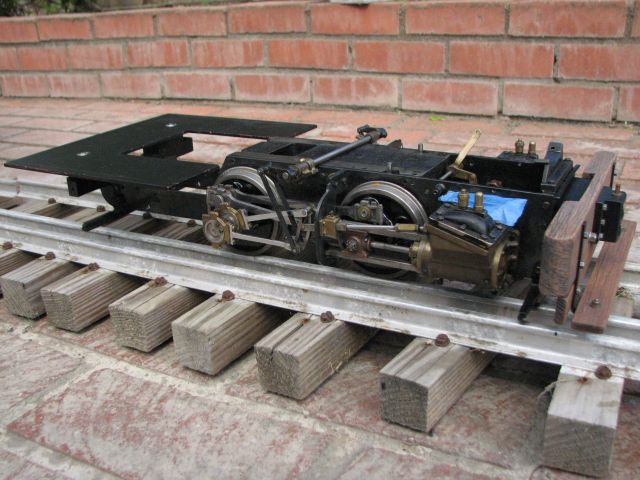
| Eric discovered that the frame was badly bent so he straightened it with a plank of wood inserted between the frames and a little brute force. The wheels have been painted black. |
| The wheels were thoroughly de-greased and then primed and painted by hand with a brush. |
| Eric took his time painting the wheels to insure a good finish. There are three coats of black enamel. |
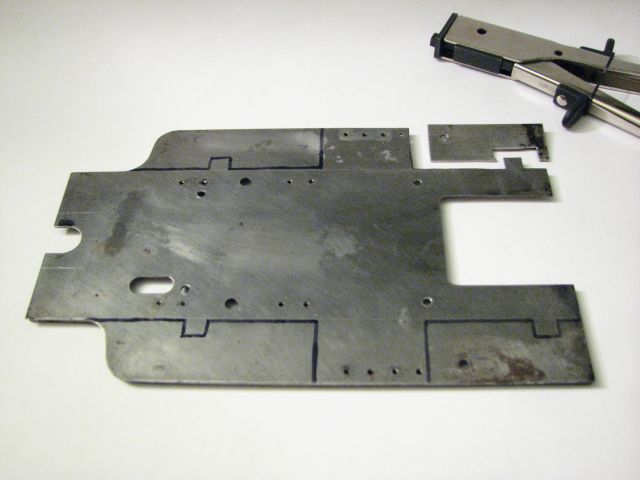
| David convinced Eric to heavily modify the stock frame deck plate to give a more open-framed American appearance. Here the lines have been marked on the deck plate and cutting has begun with the nibbler. |
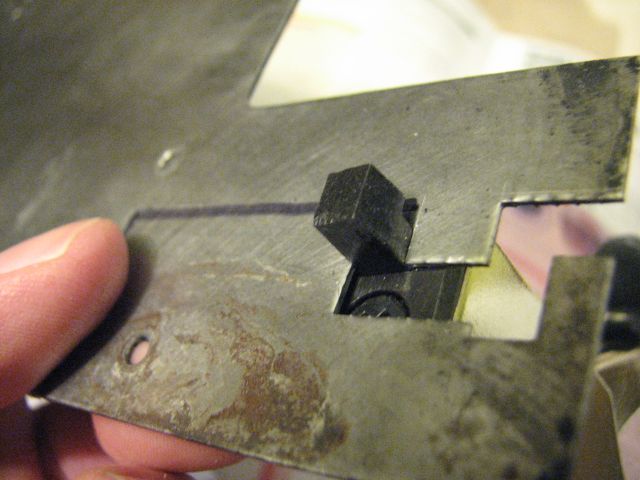
| Eric is using the nibbler to carefully cut along the lines. |
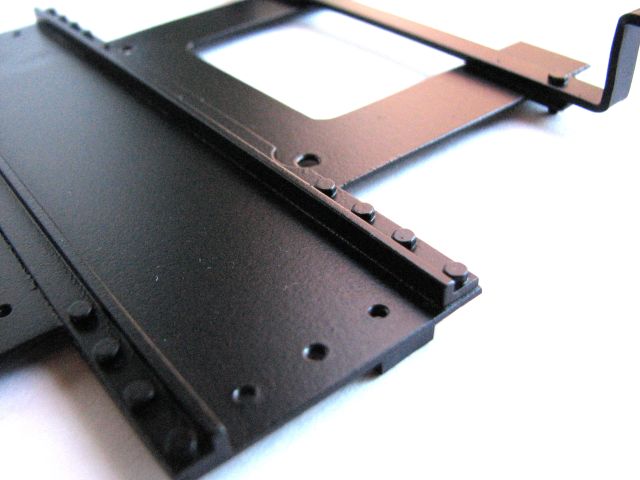
| The finished deck plate has running board brackets and cross stiffeners installed. It is painted semi-gloss black. |
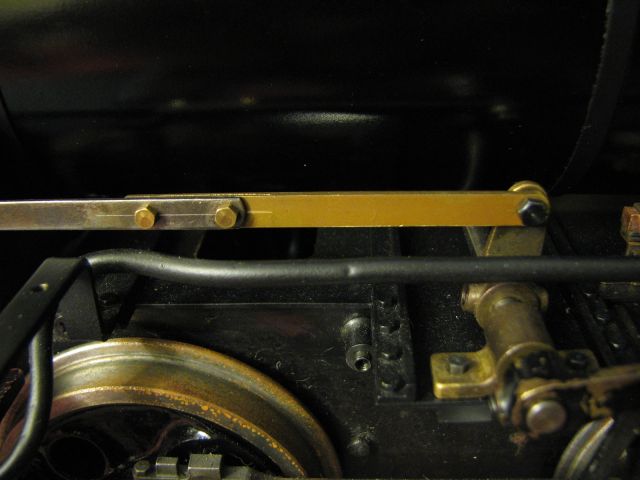
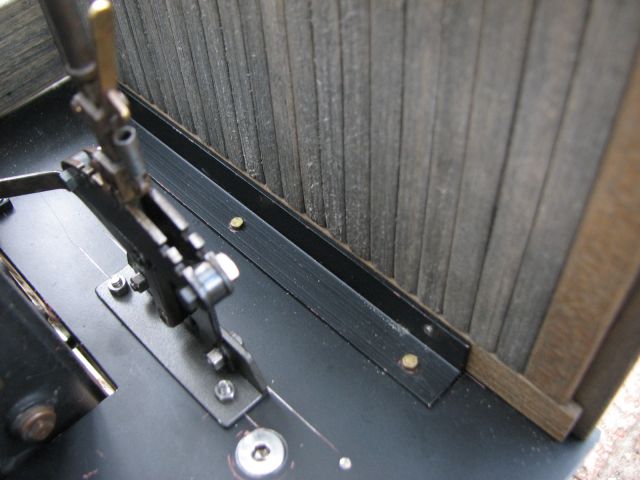
| A close up showing the cross stiffeners and mounting location for the reversing linkage bearing blocks. Running board bracket in the background. |
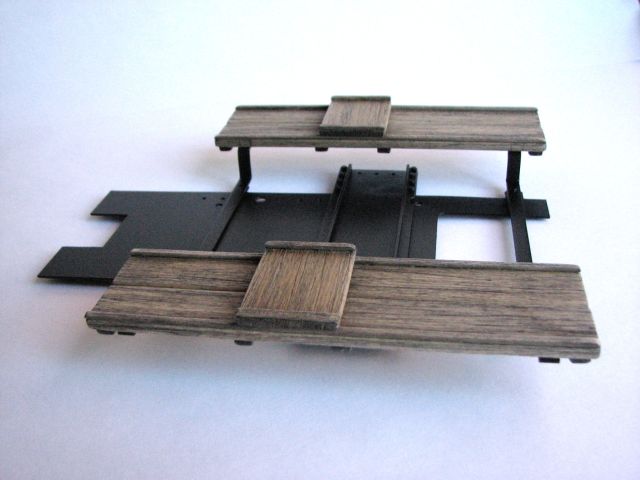
| Here are the new running boards made from weathered poplar. The step up in the middle provides clearance over the reversing linkage. |
| The running boards mocked up on the new deck plate. |
| IMG_1839.JPG |
| IMG_1840.JPG |
| IMG_1841.JPG |
| IMG_2091.JPG |
| IMG_2092.JPG |
| IMG_2098.JPG |
| IMG_2093.JPG |
| IMG_2094.JPG |
| IMG_2096.JPG |
| IMG_2095.JPG |
| IMG_2101.JPG |
| IMG_2097.JPG |
| IMG_2099.jpg |
| IMG_2100.JPG |
| IMG_2103.JPG |
| IMG_2104.JPG |
| IMG_2107.JPG |
| IMG_2110.JPG |
| IMG_2105.JPG |
| IMG_2109.JPG |
| IMG_2150.jpg |
| IMG_2151.JPG |
| IMG_2161.JPG |
| IMG_2164.JPG |
| IMG_2162.JPG |
| IMG_2163.JPG |
| IMG_2168.JPG |
| IMG_2167.jpg |
| IMG_2173.JPG |
| IMG_2174.JPG |
| IMG_2175.JPG |
| IMG_2170.JPG |
| IMG_2171.JPG |
| IMG_2177.JPG |
| IMG_2179.JPG |
| IMG_2176.JPG |
| IMG_2180.JPG |
| IMG_2182.JPG |
| IMG_2195.JPG |
| IMG_2183.JPG |
| IMG_2194.JPG |
| IMG_2193.JPG |
| IMG_2204.JPG |
| IMG_2201.JPG |
| IMG_2205.jpg |
| IMG_2203.JPG |
| IMG_2206.jpg |
| IMG_2207.JPG |
| IMG_2211.JPG |
| IMG_2213.JPG |
| IMG_2212.JPG |
| IMG_2214.JPG |
| IMG_2218.JPG |
| IMG_2225.JPG |
| IMG_2224.JPG |
| IMG_2219.jpg |
| IMG_2231.JPG |
| IMG_2220.JPG |
| IMG_2221.JPG |
| IMG_2226.JPG |
| IMG_2227.JPG |
| IMG_2230.JPG |
| IMG_2228.JPG |
| IMG_2229.JPG |
| photo.JPG |
| IMG_2235.jpg |
| IMG_2236.JPG |
| IMG_2239.JPG |
| IMG_2240.jpg |